
This is an old revision of the document!
StockWindow
The StockWindow is where you will be able to view Level1 and Level2 (market depth) data for the instrument you want to trade.
Order entry is also facilitated on the stock window through the use of hotkeys. The hotkeys are fully customizable in KeyboardSetup
1a) The Stock Window (SW) is where you can view an instrument's supply and demand and also enter orders. Click on the SW button to open a new SW.

1b) (A) Enter the symbol you wish to view followed by period and market suffix and press Enter. Example: PETR4.BZ (“PETR4” is the symbol and “.BZ” is the market suffix to which the symbol belongs to).
(B) This cell will then display the market suffix.
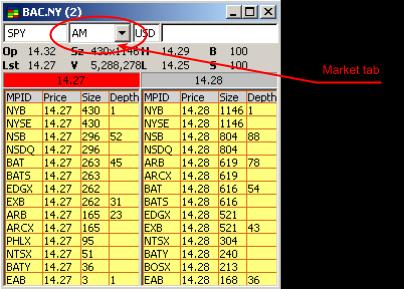
1c) The SW will populate itself with information about header, LV1 and LV2.
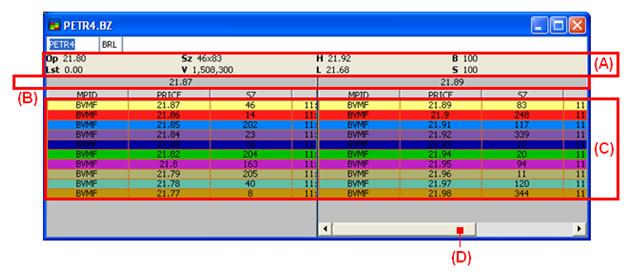
A) The header contains the following items:
- Symbol Input Box: Symbol that is being tracked.
- Opening Price (Op): Opening price of the security.
- Last Price (Lst): Most recent print. The price is denominated in local market currency.
- Size (Sz): Number of shares for each MMID.
- Volume (V): Total shares executed.
- Highest Price (H): The highest print of the day.
- Lowest Price (L): The Lowest print of the day.
- Buy (B)
- Sell (S)
(B) LV1 – Level1 contains the quotes for both buy/BID (left) and sell/ASK (right). (C) LV2 – Level2 contains the following default items:
- Market Participant Identifier (MPID): Short name of the Market/ ECN or book quoted.
- Price: The price of the security.
- Size (SZ): Number of shares for each MMID.
- Time: The time at which the oldest Bid/ Offer on that level was entered.
- Depth – used for Future Options
(D) The scrollbar located at the bottom of the ASK side (right), when moved, will also affect the BID side (left). This causes both sides to move equally at the same time, mirroring the movements of one another.
Stock Window Customization
Open the customization window by right-clicking on it. This window will show three main tabs on its left side as shown in the following image.
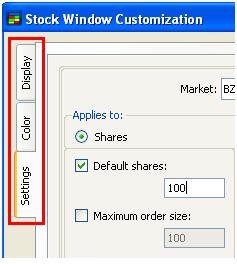
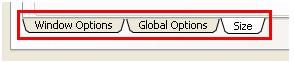
1.1a) SETTINGS Tab: Contains 3 sub-tabs; Window Options, Global Options and Size.
SETTINGS Tab > Size Sub-Tab
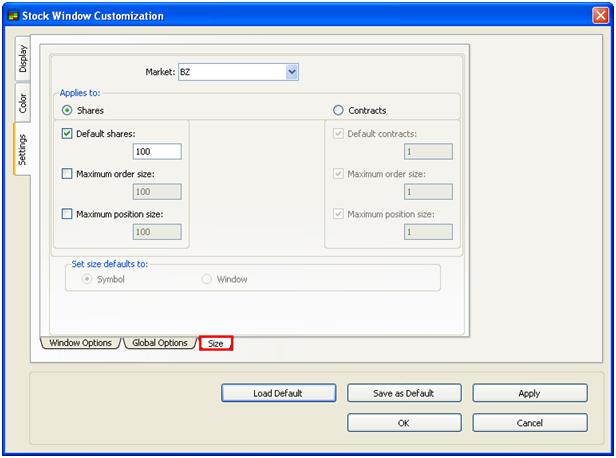
Market: (Select the market to be used) Applies to: (Select if settings will be applied to Shares or Contracts.) Shares
- Default Shares: If checked, user is allowed to enter the default amount of shares for all orders sent from
- the current SW.
- Maximum Order Size: If checked, user can enter Maximum Order Size for any order sent from the
- current SW
- Maximum Position Size: If checked, user can enter Maximum Position Size that the User can have while
- trading from the current SW.
- Contracts
- Default Contracts: If checked, user can enter the default amount of contracts for all orders sent from the
- current SW.
- Maximum Order Size: If checked, user can enter the Maximum Order Size for any order sent from the
- current SW.
- Maximum Position Size: If checked, user can enter the Maximum Position Size that the User can have
- while trading from the current SW.
Set Size Defaults to: Symbol: Default size remains by Symbol. Window: Default size remains in window regardless of Symbol.
SETTINGS Tab> Global Sub-Tab
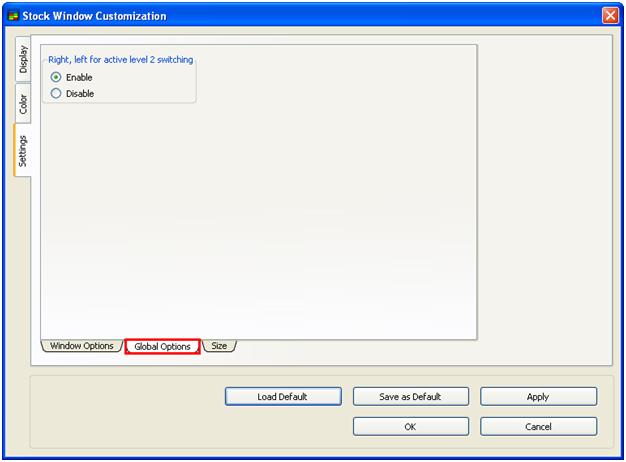
Right, Left for Active Level 2 Switching: When enabled, the user can move between the multiple stock windows by clicking the right and left arrows. SETTINGS Tab> Window Sub-Tab
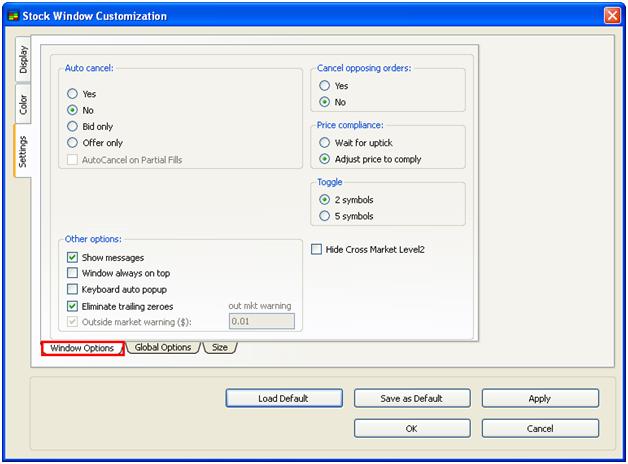
Auto Cancel Options · Auto Cancel Yes: If selected, the auto cancel functionality is turned ON. Once an order gets filled, any existing parallel order must be cancelled. · Auto Cancel No: If selected, the auto cancel functionality is turned OFF. · Auto Cancel Bid Only: Once a Buy order gets filled, any Bid on the symbol must be cancelled. · Auto Cancel Offer Only: Once a Sell order gets filled, any Bid on the symbol must be cancelled. · Auto Cancel on Partial Fills becomes available when Auto Cancel option is turned ON. Other Options · Show Messages: When checked, all orders messages will be displayed in the Message box. · Window Always on Top: When checked, SW will be on top of any other window at all times. · Keyboard Auto Popup: When checked, “Keyboard Configuration Tool” will pop-up when a key that is not assigned to an order, is pressed. · Eliminate Trailing Zeroes: When checked, any zeroes that trail the price on both LV1 and LV2 data will be eliminated. I.e. 15.9700 will be 15.97 Cancel Opposing Orders: If yes, this will send a cancel on all opposing orders at a locked or crossed price when a new order is placed. Price Compliance · Wait for uptick: · Adjust Price to comply: Toggle · 2 Symbols: SW will retain two symbols for toggling when Pageup or pageDown keys are pressed. · 5 Symbols: SW will retain five symbols for toggling when Pageup or pageDown keys are pressed. Hide Cross Market Level2: When checked, Cross Markets disappear in LV2.
1.1b) COLOR Tab
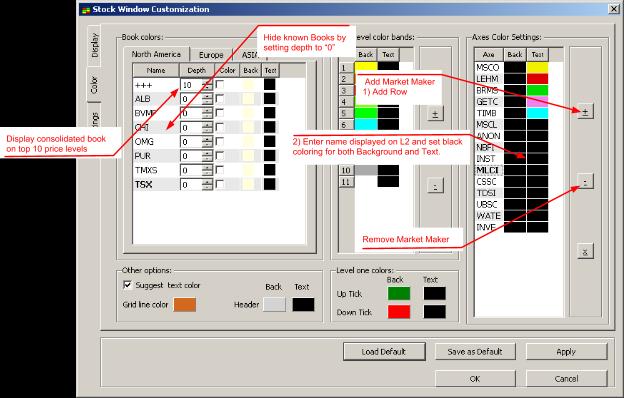
Book Colors: Allows users to select which books to display, how many levels to display and the color for each book on a Regional basis. Level One Colors: Allows users to set the colors for LV1 uptick and downtick. Other Options: Allows users to set other colors like Header and Grids. Price Level Color Bands: Allows users to set other colors per price level in the LV2 section. Axes Color Settings: Allows users to set other colors for specific Market Makers in the LV2 section.
1.1c) DISPLAY Tab: Contains 3 sub-tabs; Lines/Bars, Columns, Header, Font.
DISPLAY Tab> Lines/Bars Sub-Tab
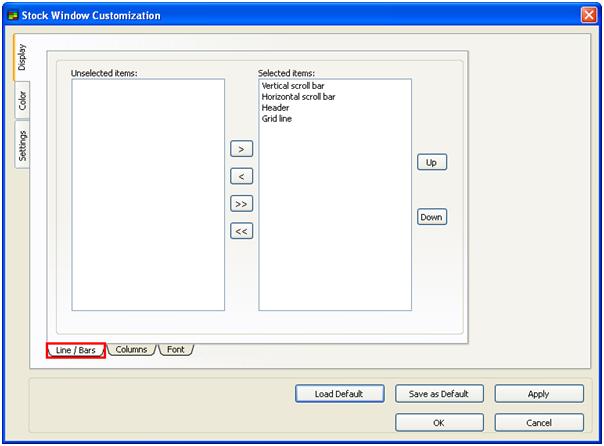
This window allows the user to select which scroll bars, lines and header should be displayed or not. Once the user shifts the item/s from the “Unselected items” list to the “Selected items” list and applies these settings, it/they will be displayed in the window.
Vertical scrollbar: If moved to unselected, vertical scrollbar will not appear in SW. · Horizontal Scrollbar: If moved to unselected, horizontal scrollbar will not appear in SW. · Grid Line: If moved to unselected, separation lines on the grid will not appear in SW. · Header: If moved to unselected, all elements and the Header itself will disappear from the SW. As shown in the following image.

DISPLAY Tab> Columns Sub-Tab
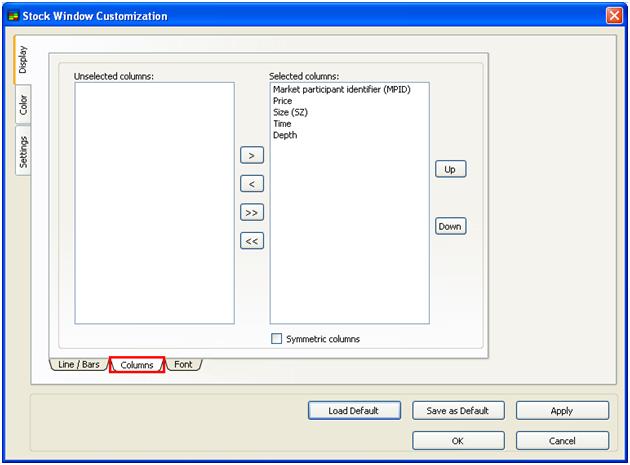
This window allows the user to manage the columns to be displayed for LV2. Again, all the items shifted to the “Selected columns” side will be displayed in the window once the settings have been applied.
DISPLAY Tab> Font Sub-Tab
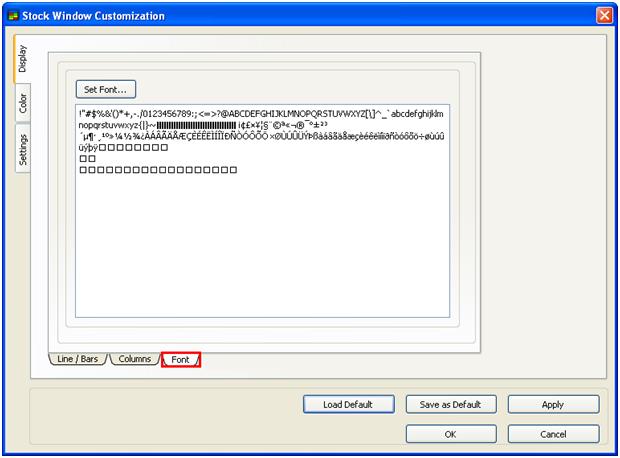
This window allows the user to set the overall font for the SW. Clicking on the “Set Font” button allows the user to pick the type and size of font the SW should use.
In this window, the user can select, font type, font style, font size and other effects desired.