
This is an old revision of the document!
Table of Contents
This work is licensed under a Creative Commons Attribution-NonCommercial-NoDerivs 3.0 Unported License.
PPro8 Order Status
Use the PPro8 Order Status window look up the status of your orders.
Open an Order Status window
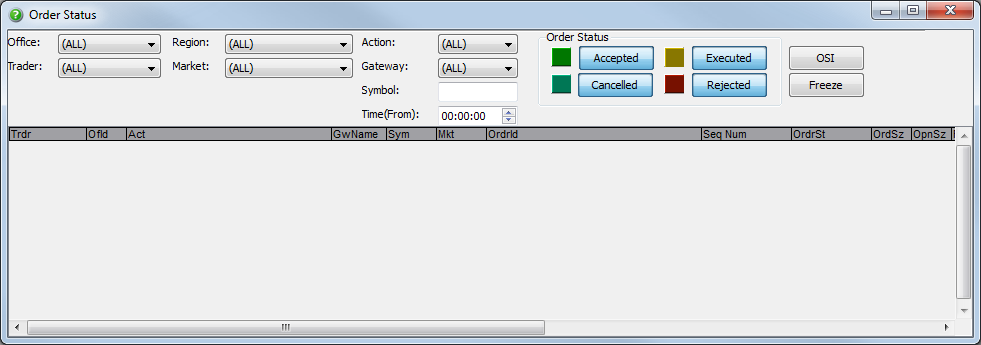
1. On the PPro8 toolbar, click OrderStatus.

2. The Order Status window appears.
Filter orders
Use the filter function to filter the order you want to find by the following parameters:
- Office: the office ID
- Region: the region where the market is located
- Trader: the trader ID
- Market: the market where the order was sent
- Action: the side of the order
- Gateway: the gateway where the order was sent
- Symbol: the symbol of the order
- Time(From): the time period from which the order was sent
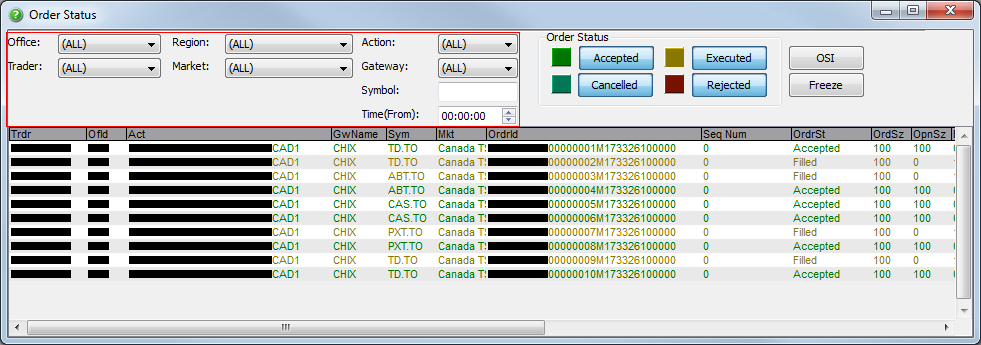
1. Click the (ALL) menu for each parameter you want to filter by, and then click an item.
2. Type a symbol, and type or click a time you want to filter by.
3. The Order Status window shows the status of orders based on the filters you set.
Change order status color
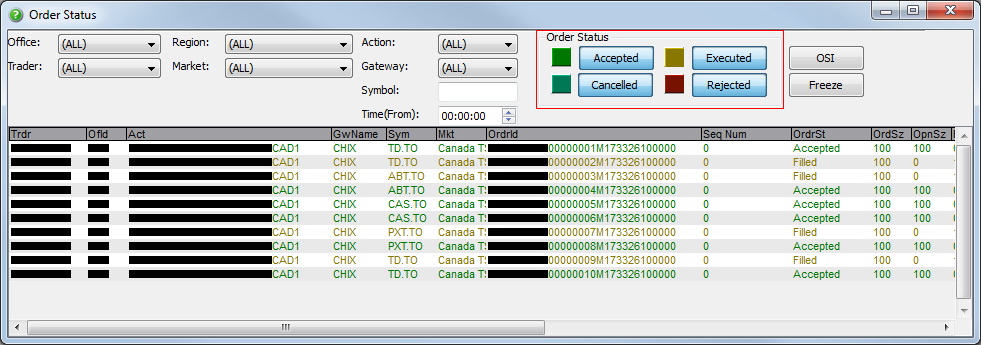
Use the color customization function to change the color of orders by status, whether accepted, cancelled, executed, or rejected.
1. Double-click a color box for the order status type you want to change the color for.
2. The Sage color dialog window appears.
3. Click a color, and then click OK.
4. The new color is set.
Order Status components
The Order Status window shows the following information on all sent orders:
- Trdr: the trader ID for the order
- OfId: the office code for the order
- Act: the account ID for the order
- GwName: the name of the gateway where the order was sent
- Sym: the symbol of the order
- Mkt: the market for the order
- OrdrId: the assigned order ID that uniquely identifies the order
- SeqNum: the sequence number for the order
- OrdrSt: the order status of the order
- OrdSz: the order size
- OpnSz: the open size of the order
- FilSz: the fill size of the order
- ExecSz: the execution size of the order
- Cy: the currency of the order
- MktTime: the local market time of the order
- Reg: the market region of the order
- DstName: the destination name of the order
- ViaApi: whether or not the order was sent via PProAPI
- OrderClass: the name of the order from Keyboard Setup
Order Status Inquiry Window
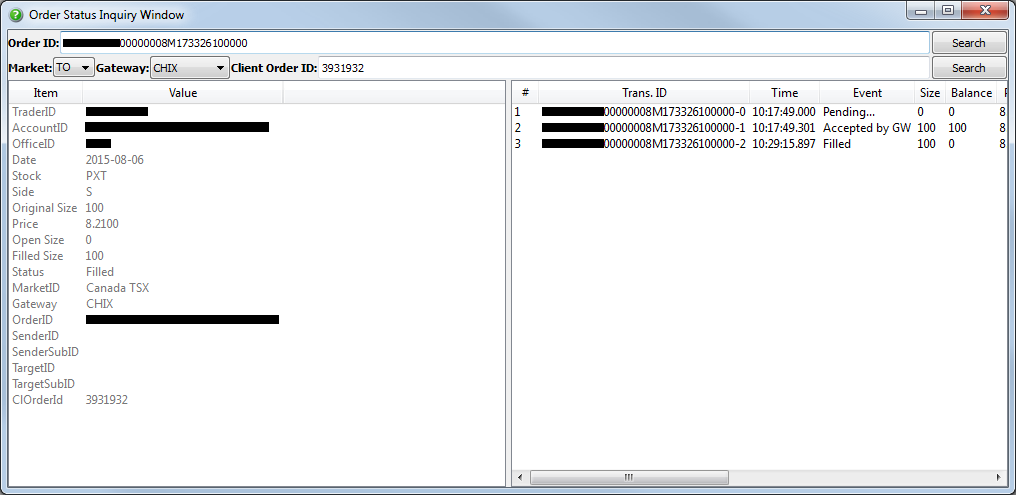
Use the Order Status Inquiry Window to view detailed information about each order, and search through orders by order number, gateway, and client order ID.
- Double-click an order to open the Order Status Inquiry Window. Or, click OSI.
Search order statuses
1. In the Order Status Inquiry Window, click the Market or Gateway menu to show order status by market or gateway.
2. Type or paste the Order ID or Client Order ID in the respective field, and then press Enter, to show order status by order ID or client order ID.
- Order ID: the assigned order ID that uniquely identifies the order in PPro8
- Gateway: the gateway where the order was sent
- Client Order ID: the assigned order ID that uniquely identifies the order in the market
Freeze and unfreeze the Order Status window
1. To freeze a snapshot of the Order Status window at any time, click Freeze in the Order Status window.
2. To unfreeze the Order Status window, click Unfreeze.
Order Status Customization
To make changes to the Order Status settings, right-click anywhere in the Order Status window to open the Order Status Customization window. Or, click Ctrl+O. This window displays two tabs on the left: Columns and Fonts.
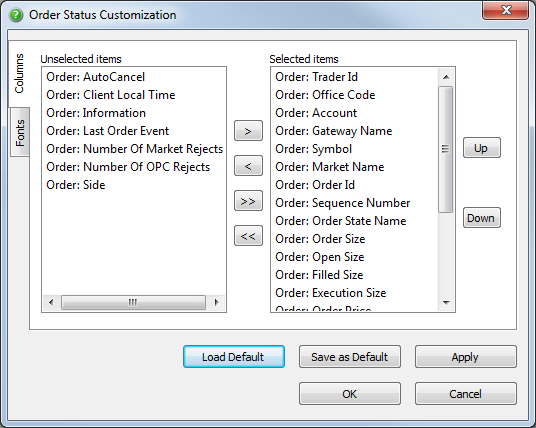
Columns
Use the Columns window to show or hide items in the Order Status window.
- Click the Columns tab to open the Columns window.
Hide an item from the Order Status window
1. In the Columns window, click an item in the Selected items list.
2. Click the left arrow to move the item to the Unselected items list.
3. Click OK.
4. The item is hidden from the Order Status window.
Show an item in the Order Status window
1. In the Columns window, click an item in the Unselected items list.
2. Click the right arrow to move the item to the Selected items list.
3. Click OK.
4. The item is hidden from the Order Status window.
Fonts
Use the Fonts window to set the overall font for the Order Status window.
- Click the Fonts tab to open the Fonts window.
Set a font for the Order Status window
1. In the Fonts window, click Set Font.
2. The Select Font window appears.
3. Click the font, font styles, size, effects, and writing system you want to set.
4. Click OK.
5. In the Order Status Customization window, click OK.
6. The new font is set.