
Table of Contents
PPro8 Order Status
Use the PPro8 Order Status window look up the status of your orders.
Open an Order Status window
1. On the PPro8 toolbar, click OrderStatus.

2. The Order Status window appears.
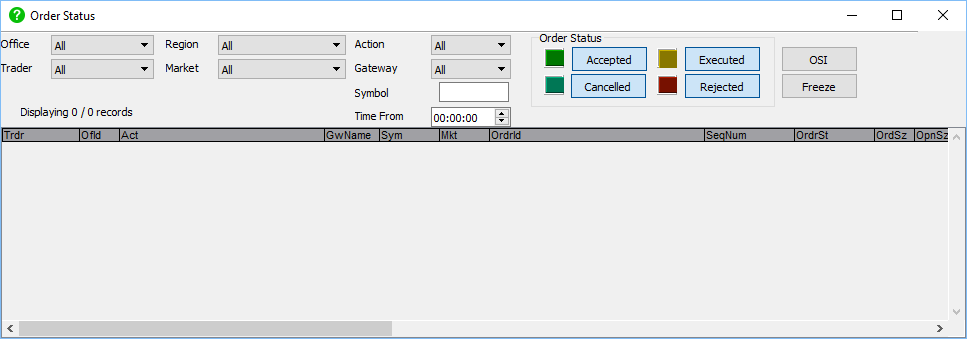
Filter orders
Use the filter function to filter the order you want to find by the following parameters:
- Office: the office ID
- Region: the region where the market is located
- Trader: the trader ID
- Market: the market where the order was sent
- Action: the side of the order
- Gateway: the gateway where the order was sent
- Symbol: the symbol of the order
- Time(From): the time period from which the order was sent
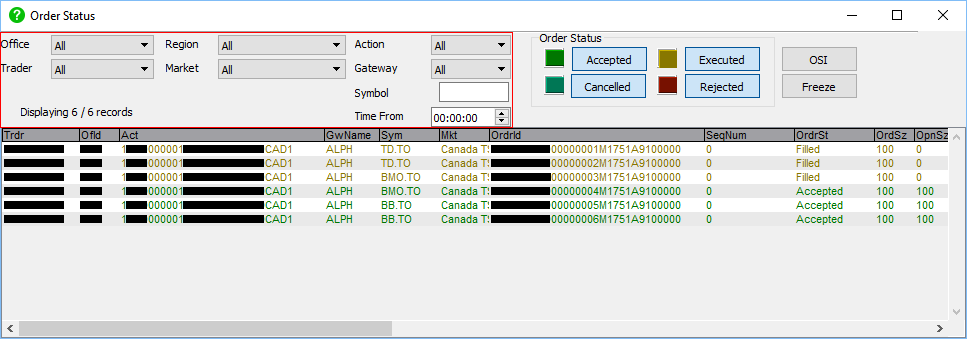
1. Click the (All) menu for each parameter you want to filter by, and then click an item.
2. Type a symbol, and then type or click a time you want to filter by.
3. The Order Status window shows the status of orders based on the filters you set.
Change order status color
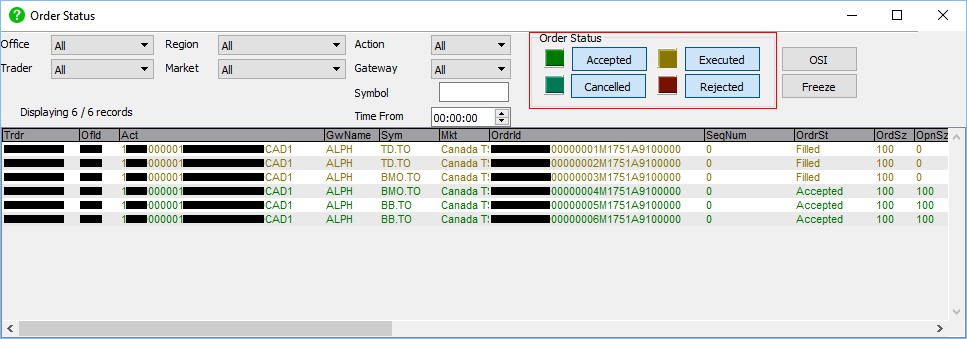
Use the color customization function to change the color of orders by status, whether accepted, filled, cancelled, executed, or rejected.
1. Double-click a color box for the order status type you want to change the color for.
2. The Color Selector window appears.
3. Click a color, and then click OK.
4. The new color is set.
Cancel an order from the Order Status window
- To cancel an order from the Order Status window, select the order, and then press Esc.
Order Status components
The Order Status window shows the following information on sent orders:
- Trdr (Trader Id): the trader ID for the order
- OfId (Office Code): the office code for the order
- Act (Account): the account ID for the order
- GwName (Gateway Name): the name of the gateway where the order was sent
- Sym (Symbol): the symbol of the order
- Mkt (Market Name): the market for the order
- OrdrId (Order Id): the automatically generated order ID that uniquely identifies the order
- SeqNum (Sequence Number): the sequence number for the order
- OrdrSt (Order State Name): the order status of the order
- OrdSz (Order Size): the order size
- OpnSz (Open Size): the open size of the order
- FilSz (Filled Size): the fill size of the order
- ExecSz (Execution Size): the execution size of the order
- OrdPx (Order Price): the accepted price of the order
- ExecPx (Execution Price): the execution price of the order
- Cy (Currency Name): the currency of the order
- MktTime (Market Time): the local market time of the order
- Reg (Region Name): the market region of the order
- DstName (Destination Name): the destination name of the order
- ViaApi (Order sent via PProApi): whether the order was sent via PProAPI—Yes or No
- OrdCls (Order Class): the name of the order from Keyboard Setup
- AutoCn (AutoCancel): whether AutoCancel was on—Yes or No
- ClntTime (Client Local Time): the time of the order on the local client side
- Info (Information): other information about the order, such as liquidity flags and tags
- LstEvnt (Last Order Event): the last event of the order
- MktCnclRjct# (Number of Market Rejects): the number of rejections by the market
- OpnCnclRjct# (Number of OPC Rejects): the number of rejections by the OPC server
- Side: the side of the order
- SentViaAPI: information on whether the order was sent via API
To select multiple orders, use Shift + Mouse Click.
Order Status Inquiry Window
Use the Order Status Inquiry Window to view detailed information about each order, and search through orders by order number, gateway, and client order ID.
- Double-click an order to open the Order Status Inquiry Window. Or, click OSI.
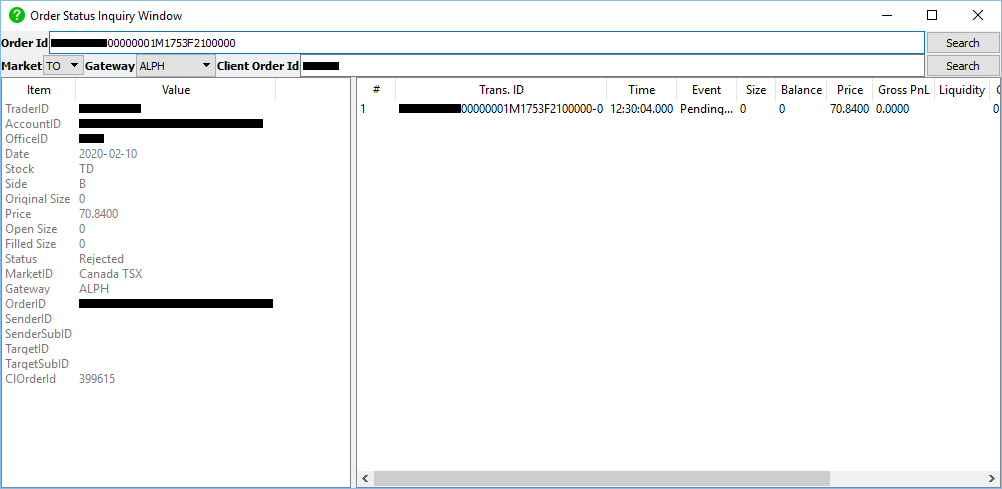
Search order statuses
1. In the Order Status Inquiry Window, click the Market or Gateway menu to show order status by market or gateway.
2. Type or paste the Order Id or Client Order Id in the respective field, and then press Enter, to show order status by order ID or client order ID.
- Order Id: the automatically generated order ID that uniquely identifies the order in PPro8
- Gateway: the gateway where the order was sent
- Client Order Id: the automatically generated order ID that uniquely identifies the order in the market
Freeze and unfreeze the Order Status window
1. To freeze a snapshot of the Order Status window at any time, click Freeze in the Order Status window.
2. To unfreeze the Order Status window, click Unfreeze.
Order Status Customization
To make changes to the Order Status settings, right-click anywhere in the Order Status window, and then click Order Status Customization to open the Order Status Customization Dialog window. Or, click Ctrl + O. This window displays two tabs on the left: Columns and Font.

Columns
Use the Columns window to show or hide items in the Order Status window.
- Click the Columns tab to open the Columns window.
Hide an item from the Order Status window
1. In the Columns window, click an item in the Selected Items list.
2. Click the left arrow to move the item to the Unselected items list.
3. Click OK.
4. The item is hidden from the Order Status window.
Show an item in the Order Status window
1. In the Columns window, click an item in the Unselected items list.
2. Click the right arrow to move the item to the Selected items list.
3. Click OK.
4. The item is hidden from the Order Status window.
Font
Use the Font window to set the overall font for the Order Status window.
- Click the Font tab to open the Font window.
Set a font for the Order Status window
1. In the Font window, click Set Font.
2. The Select Font window appears.
3. Click the font, font styles, size, effects, and writing system you want to set.
4. Click OK.
5. In the Order Status Customization window, click OK.
6. The new font is set.
Order Status Alignment & Filtering Columns
Most columns in the Order Status tool now have options to set alignment and filters to them. The columns where filtering can be applied to are:
- Trdr
- Ofld
- GwName
- Sym
- Mkt
- OrdrId
- MktTime
- ViaApi
- ClOrdId
- OrdCls
- ClntTime
- Info
- Side
Adjusting Alignment
To adjust the alignment of the noted columns, please take the following steps:
1. Right click on any of the above-noted filters in the tool. 2. A pop-up menu will appear and will provide you the ability to set an alignment to either:
- Left (default)
- Center
- Right

3. Select your desired alignment and press OK to apply the new rule.
Applying A Filter
To access the filters, please take the following steps:
1. Right click on any of the above-noted filters in the tool.
2. A pop-up menu will appear and will provide you the ability to create filters.

3. Select “Activate Filter for …” button. This will unlock the lower area of this menu, and allow you to set your filter parameters.

4. Enter the syntax that you would like to filter for, or filter out, in the “Regular Expression” box. For more information on RegEx filtering, please review the following link.

5. Set the foreground and background colors by selecting the color swatches and selecting a desired color.

6. In the Filter Modes, you have four options, from which you can only select one:
- ShowMatchingRowsOnly: This will only show matching rows.
- Hide Matching Rows: This will hide matching rows.
- Highlight Rows Only: This will highlight the match rows.
- Highlight Cell Only: This will only highlight the matching cell.
7. Finally, press OK to apply the filter.
- Note: If you would like to search for case sensitive information, then please leave “Ignore Case” unchecked. If case sensitivity is not an issue, then please check “Ignore Case.”