
Table of Contents
PPro8 Stock Window
The PPro8 Stock Window displays market depth data, in Level 1 (Lv1) and Level 2 (Lv2), for trading instruments.
Use the Stock Window to view an instrument's supply and demand, and to enter orders. You can enter orders through the Stock Window by using keyboard shortcuts. Keyboard shortcuts are fully customizable in Keyboard Setup.
The PPro8 framework now supports Deregister for a symbol using slash '/' or backslash '\'.
Open a new Stock Window
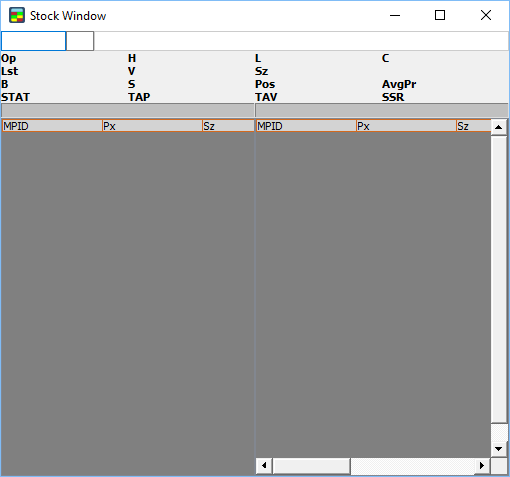
1. On the PPro8 toolbar, click StockWindow.

2. An empty Stock Window appears.
View market depth data in the Stock Window
1. Type the symbol in the first field of the Order Edit Box at the top left (for example, BB).
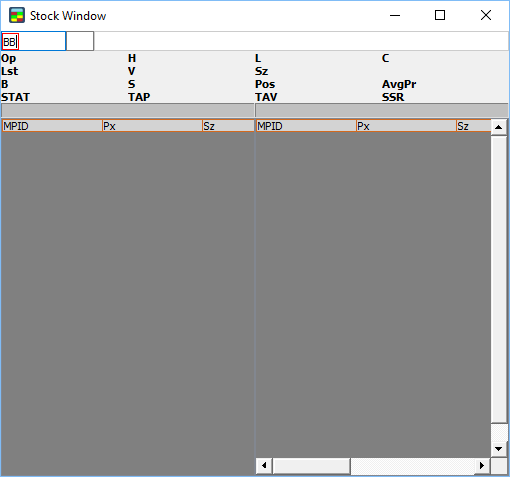
2. Press Tab.
3. Type or click the symbol's market extension (for example, TO).
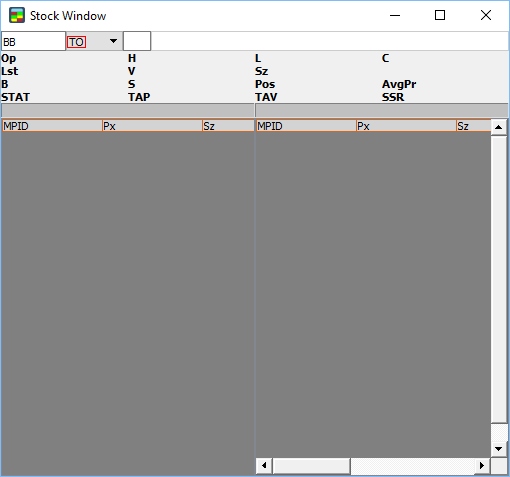
4. Press Enter.
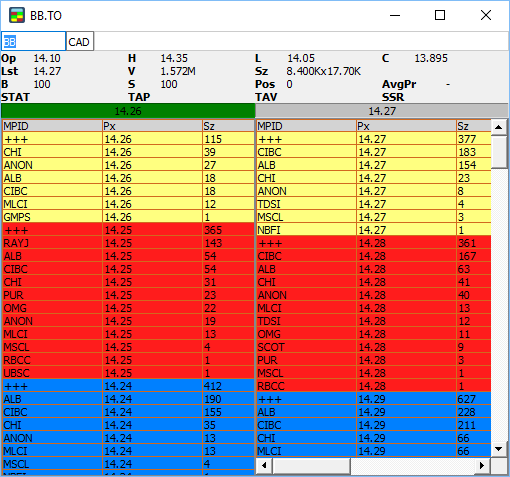
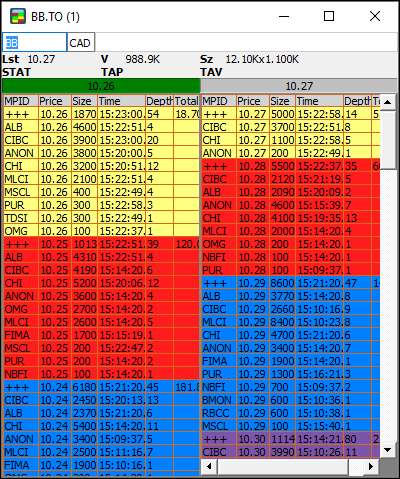
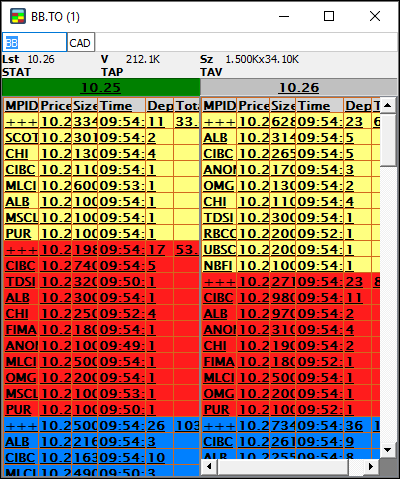
5. The Stock Window populates with information about the symbol, in the header, Lv1, and Lv2.
- To use the copy-and-paste function in the Stock Window, right click the symbol in the symbol field, click Copy or press Ctrl + C, click Paste or press Ctrl + V in another Stock Window, type or click the market extension, and then press Enter to load market data for the symbol.
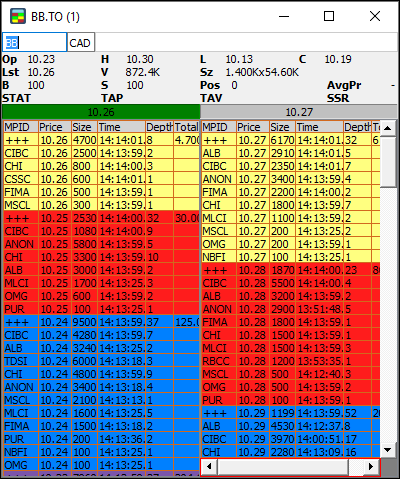
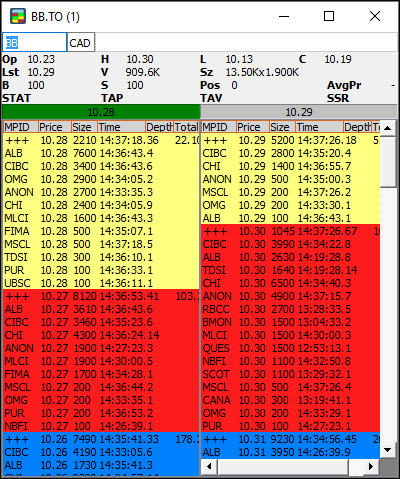
Stock Window components
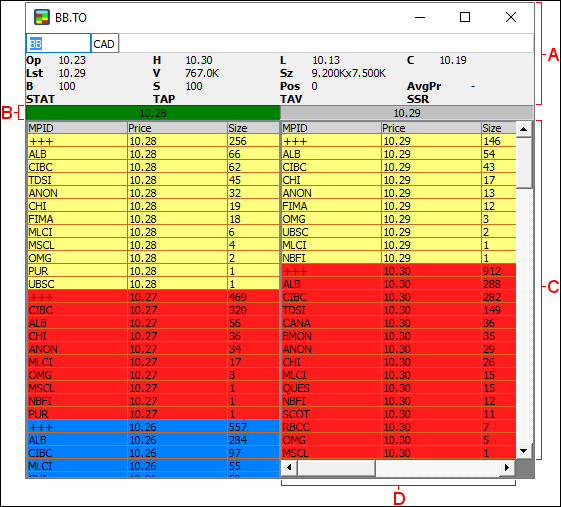
A. The header and instrument row contain the following items:
- Order entry box: for the symbol being tracked.
- *Op (Opening price): the opening price of the security.
- *C (Closing price): the last closing price of the security.
- Lst (Last price): the most recent print. The price is denominated in the local market currency.
- Sz (Size): this represents the total number of shares bid x offered at the current best bid x offer prices.
- V (Volume): the total number of shares executed so far.
- *H (Highest price): the highest print of the day.
- L (Lowest price): the lowest print of the day.
- B (Buy): the number of shares set for the buy side.
- S (Sell): the number of shares set for the sell side.
- Pos (Position): the size of the position.
- AvgPr (Average Price): the average price of the stock.
- STAT (Status): the current trading status of the instrument (see STAT Values table below for details).
- Theoretical auction values for equities:
- TAP (Theoretical Auction Price): the value at which an auction is expected to open.
- TAV (Theoretical Auction Volume): the auction trading volume.
- SSR: the short-sell restriction status currently on the stock:
- Y: short selling is restricted
- N: short selling is not restricted/deactivated
- C: short-sell restriction continued
- E: SSR in effect due to intra-day price drop
- *Note: the Op, C, and H values will be displayed in brackets “{ )” when the stock is in the pre-market, with the brackets removed once the continuous trading session has begun.
STAT Values
| STAT ID | Description |
|---|---|
| UD | Undefined |
| C | Closed |
| O | Opening Auction |
| T | Continuous Trading |
| V | Intraday Auction (Unscheduled) |
| I | Intraday Auction (Scheduled) |
| E | Close Auction |
| NAS | No Active Session |
| LC | Compilation |
| BRK | Intraday Break (Scheduled) |
| RO | Reporting Only) |
| FP | Fix Price Trading |
| AP | Administration Phase |
| PET | Pre-Market Trading |
| POT | Post-Market Trading |
| IC | Intraday Close (Scheduled) |
| QP | Quotation Only |
| U | Up |
| D | Down |
| R | In Recovery |
B. Best Bid (left) and Best Offer (right).
C. Lv1 and Lv2: Lv1 is the first row in the market depth table, while Lv2 is composed of the rows that follow. Lv1 and Lv2 contain the following items by default:
- MPID (Market Participant Identifier): the shortened name of the quoted market/ECN or book.
- Price: the price of the security.
- Sz (Size): the number of shares for each MMID.
- Time: the time at which the oldest Bid/Offer on that level was entered.
- Depth: the number of participating orders on that level.
- Total: the cumulative number of shares per price level, available only on the consolidated (+++) book.
D. The horizontal scroll bar at the bottom of the Ask side (right) affects the Bid side (left) as well. Move the scroll bar left or right to move both sides horizontally at the same time. Similarly, move the vertical scroll bar on the right of the Ask side to move both sides vertically at the same time.
Add a symbol to an existing symbol list
You can use Stock Window to add a currently registered symbol to an existing symbol list. This new feature integrates seamlessly with the Symbol List Editor tool, as well as Chart Window, Time of Sales, and Summary.
1. Right-click anywhere in the Stock Window to open the context menu.
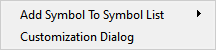
2. Point to the Add Symbol to Symbol List menu item.

3. The Currently Selected Symbol List view appears. Click [Select A List] to choose the symbol list where you want to add the current symbol, and then click the Add Symbol button.
4. The symbol is added to the symbol list.
5. To remove a symbol from the list, you will need to open the Symbol List Editor tool and delete it there. For more information, you can read the Symbol List Editor manual.
Send a Bracket Order
1. Configure a Bracket Order in Keyboard Setup.
2. In the Stock Window, press the key for the Bracket Order (for example, F3).
3. The Bracket Order comment for the lower component appears (for example, Bracket Order Lower Limit (New Order)).
4. Press the pre-assigned key for the order you wish to set as the lower component (for example, F1).
5. The Order Edit Box appears.
6. Type the desired price and shares for the lower component order, and then press Enter.
7. Press the key for the Bracket Order (for example, F3).
8. The Bracket Order comment for the upper component appears (for example, Bracket Order Upper Limit (Stop Order)).
9. Press the pre-assigned key for the Stop Order (for example, F4).
10. The Order Edit Box appears with the Stop Price field.
11. Press the pre-assigned key for the order (Buy or Sell) you wish to set as the upper limit (for example, F2).
12. The Order Edit Box updates to also show the Limit Price and Shares fields.
13. Type the desired stop (trigger) price and the limit price and shares of the order you wish to execute upon the stop price being met.
14. Type the desired price and shares for the upper component order, and then press Enter.
15. The Bracket Order script is set.
16. When the lower or the upper limit is reached, the order gets filled, and the opposite order component gets cancelled automatically.
Bracket Order entry behavior
- If you wish to adjust any of the parameters of the bracket order, then the entire bracket must be cancelled and re-entered.
- If you cancel any one of the bracket's two orders, then the whole bracket will cancel.
- To cancel a bracket order, click the corresponding row in History Log, and then press Esc.
- If you have cancel/replaced any one of the bracket's two orders, then the BracketOrder script will be stopped and the system will only keep the cancel/replaced order.
- If the bracket order script ran successfully, then the order will be cancelled automatically.
Stock Window Customization
To make changes to the Stock Window settings, right-click anywhere in the Stock Window, and then click the Customization Dialog menu item to open the Stock Window Customization window. This window displays three main tabs on the left: Display, Color, and Settings.
Autocomplete
This feature allows PPro8 to provide a list of available symbols starting with a certain string pattern after you have entered at least one character into the Stock Window.
1. Right click on the Stock Window, and select “Customization Dialog.”

2. Go to the Settings tab.

3. Select “Autocomplete Symbol,” under the “Other Options” heading, ensuring the checkmark is visible.

4. Press “Apply,” then press “OK.”
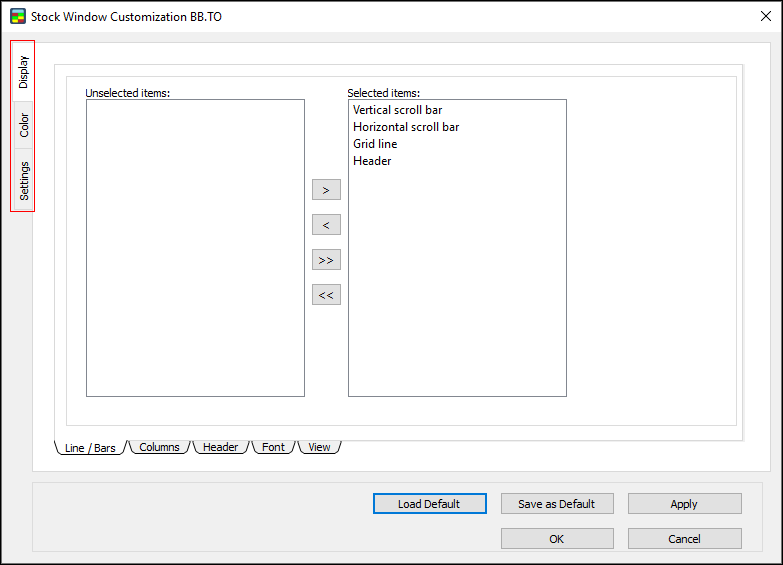
Display
Use the Display window to set the display settings for the Stock Window.
- Click the Display tab to open the Display window.

The Display window contains five sub-tabs: Line/Bars, Columns, Header, Font, and View.
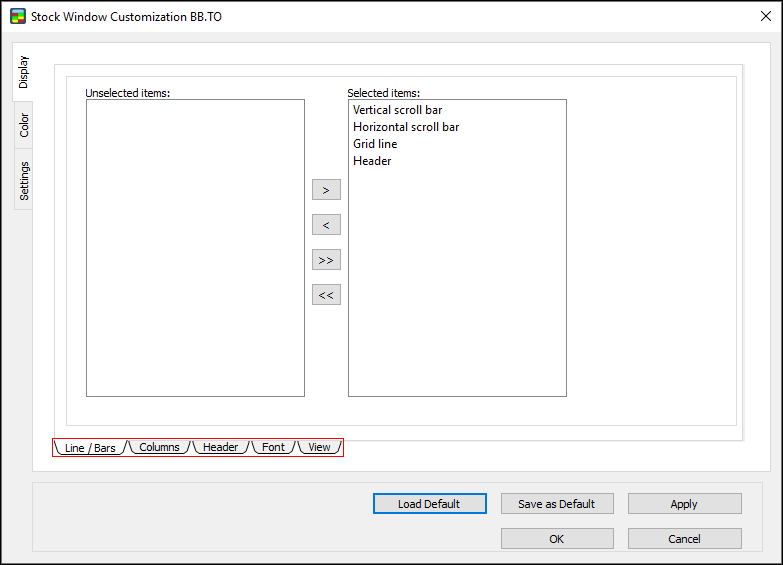
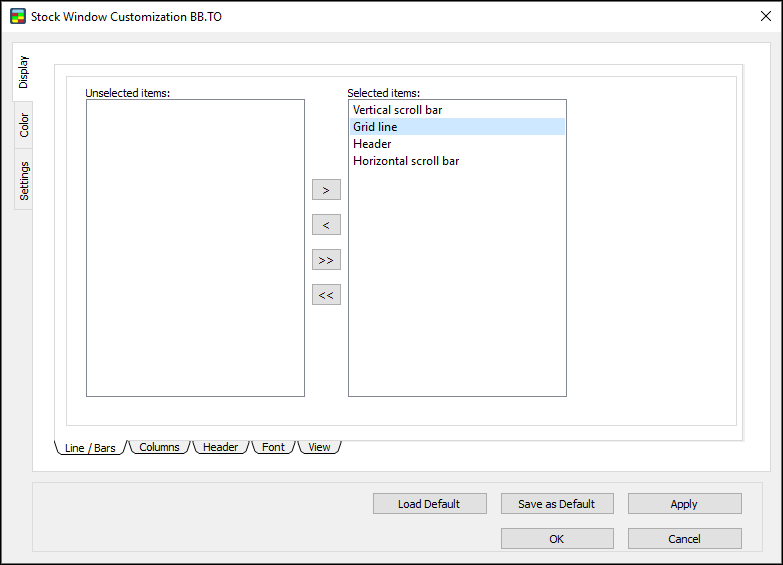
Line/Bars
Use the Line/Bars window to show or hide scroll bars, line, and the header.
1. Click the Line/Bars sub-tab in the Display window.

2. The Line/Bars window appears.
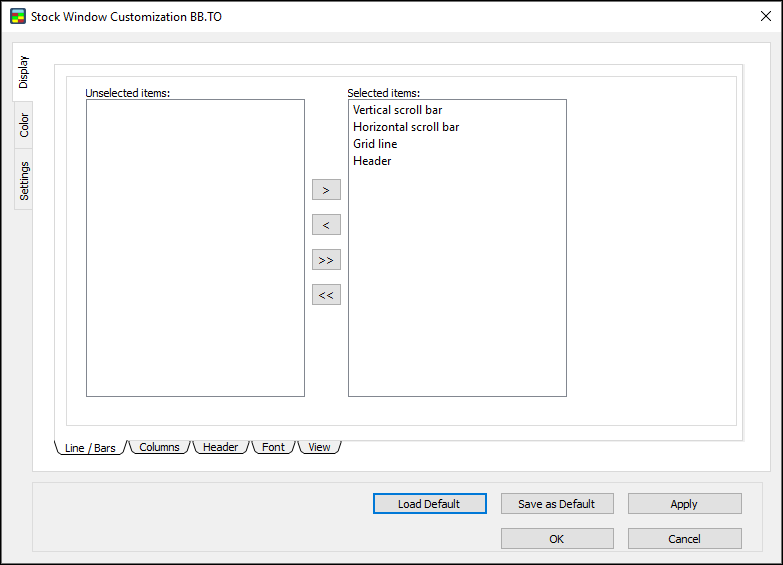
Show an item in the Stock Window
1. In the Line/Bars window, click an item in the Unselected items list.
2. Click the right arrow to move the item to the Selected items list.
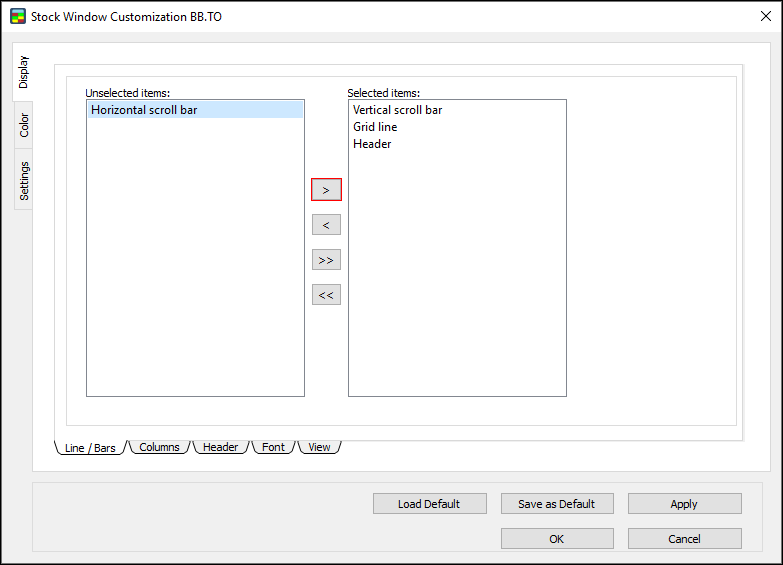
3. Click OK.
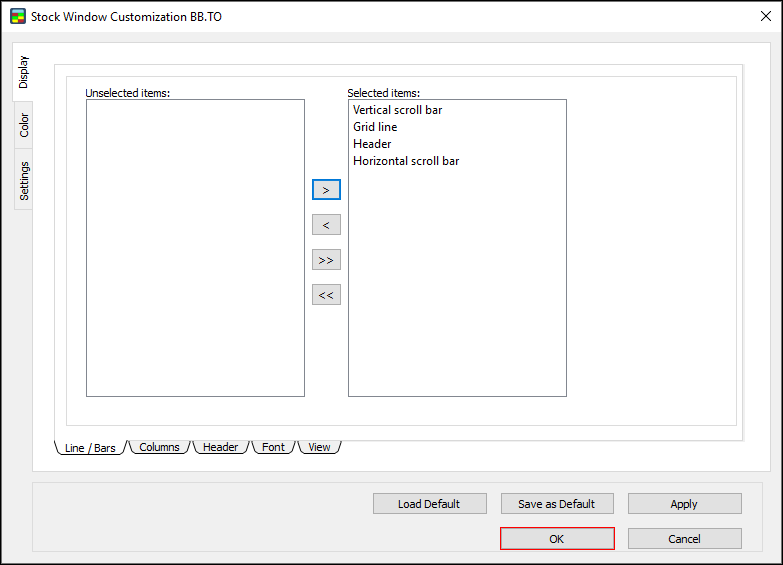
4. The item appears in the Stock Window.
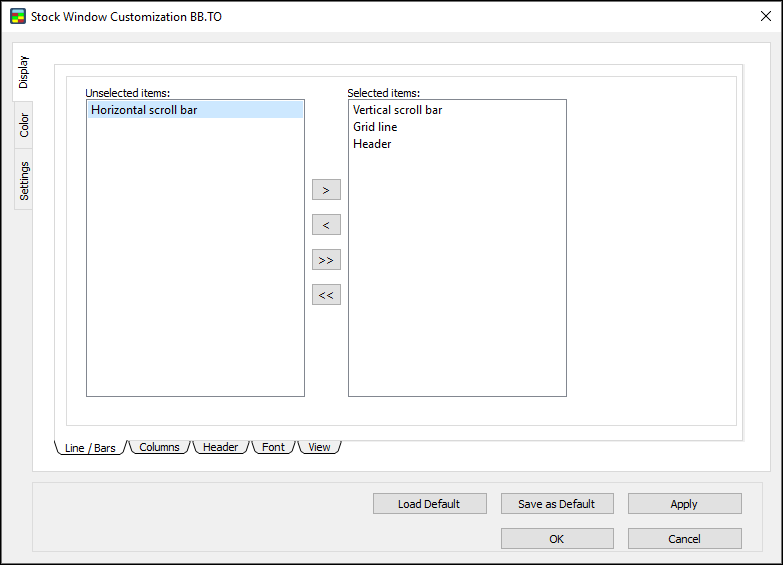
Hide an item from the Stock Window
1. In the Line/Bars window, click an item in the Selected items list.
2. Click the left arrow to move the item to the Unselected items list.
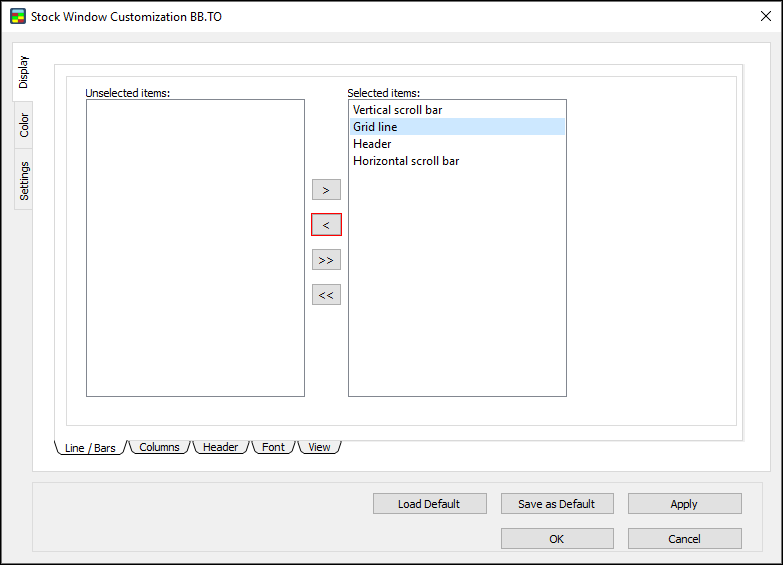
3. Click OK.
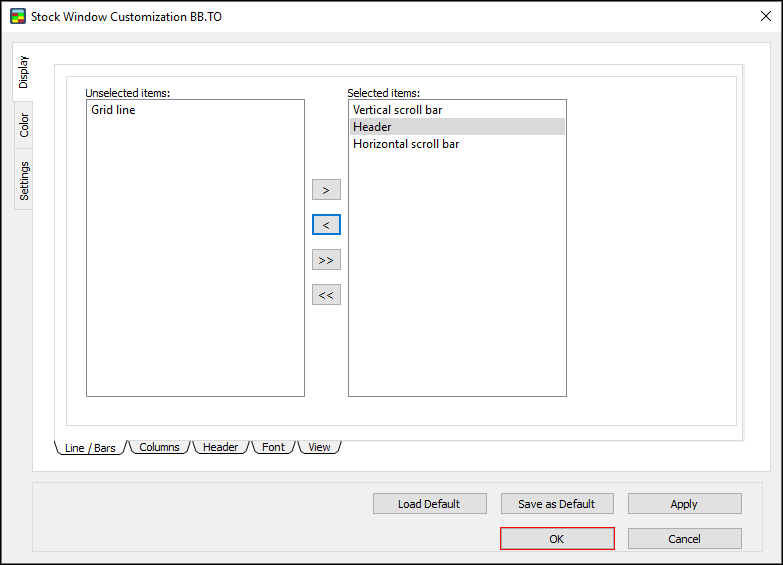
4. The item is hidden from the Stock Window.
Columns
Use the Columns window to manage the columns that appear in Lv2.
1. Click the Columns sub-tab in the Display window.

2. The Columns window appears.
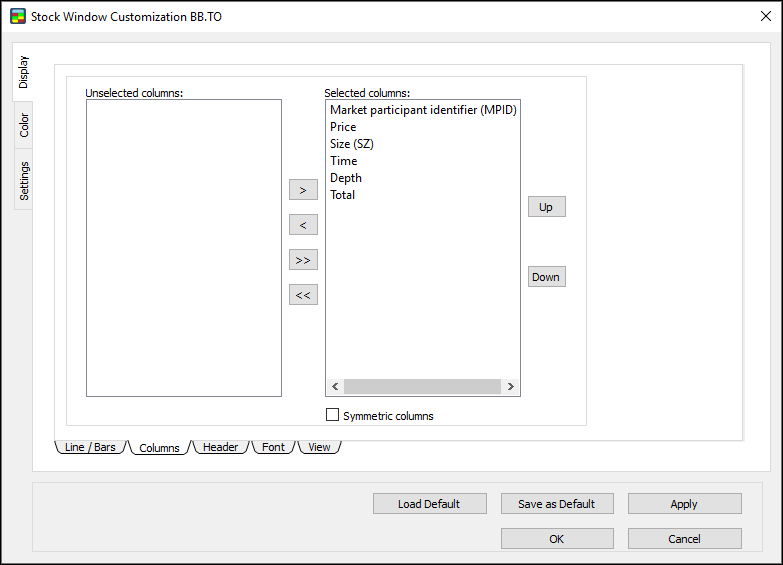
As in the above instructions for Line/Bars, all items moved to the Selected items side appear in the Stock Window, and all items moved to the Unselected items side are hidden, when the settings are applied.
Header
Use the Header window to manage the header rows that appear in Lv2.
1. Click the Header sub-tab in the Display window.

2. The Header window appears.
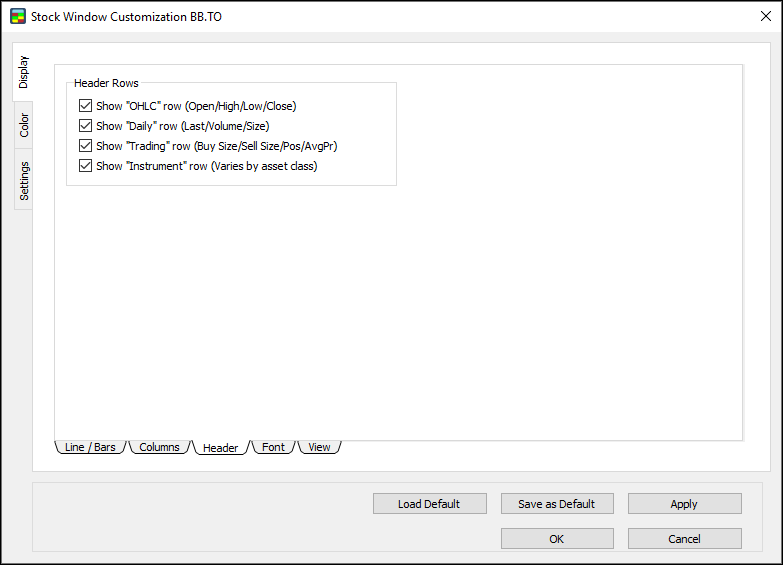
3. Select or clear the check boxes to show or hide the various Header Rows (OHLC, Daily, Trading, Instrument).
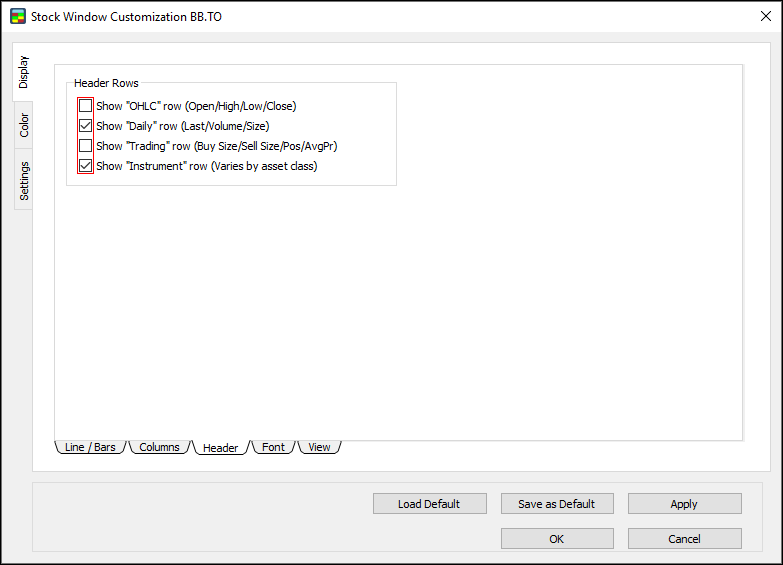
4. Click OK.
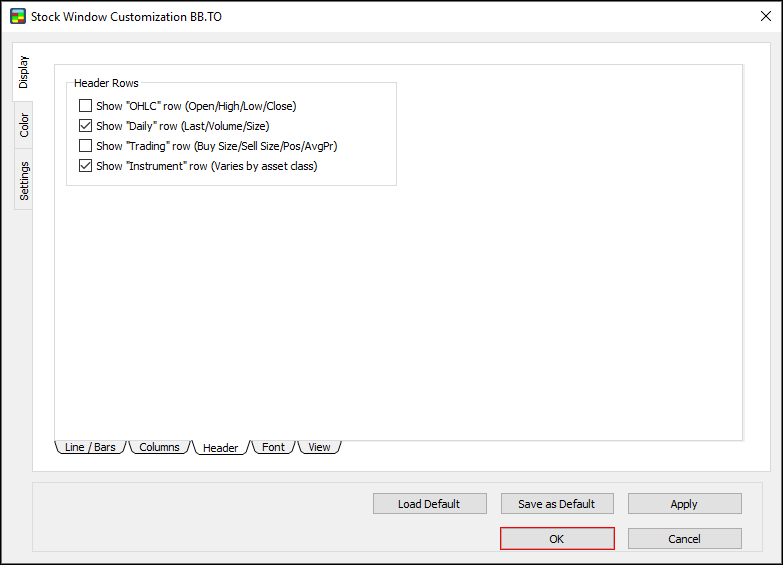
5. The Stock Window appears with the selected rows shown and the cleared rows hidden.
Font
Use the Font window to set the overall font for the Stock Window.
Set a font for the Stock Window
1. In the Display window, click the Font sub-tab.

2. The Font window appears.
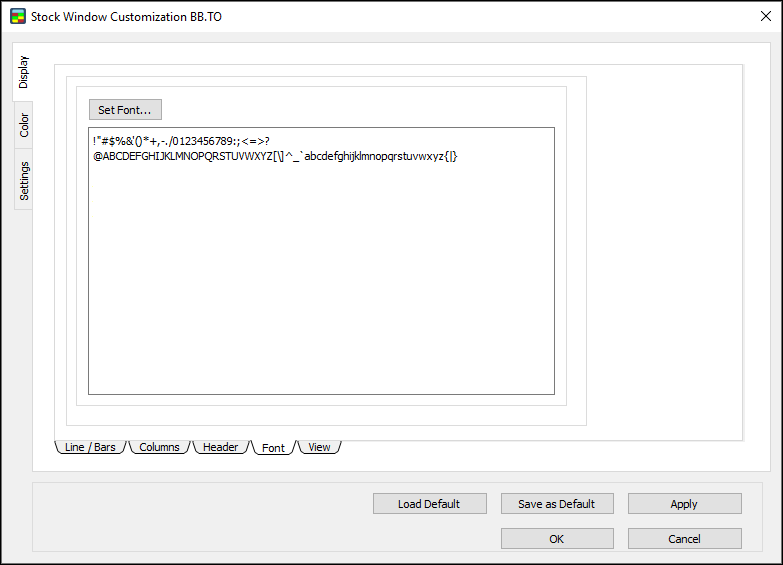
3. Click Set Font….
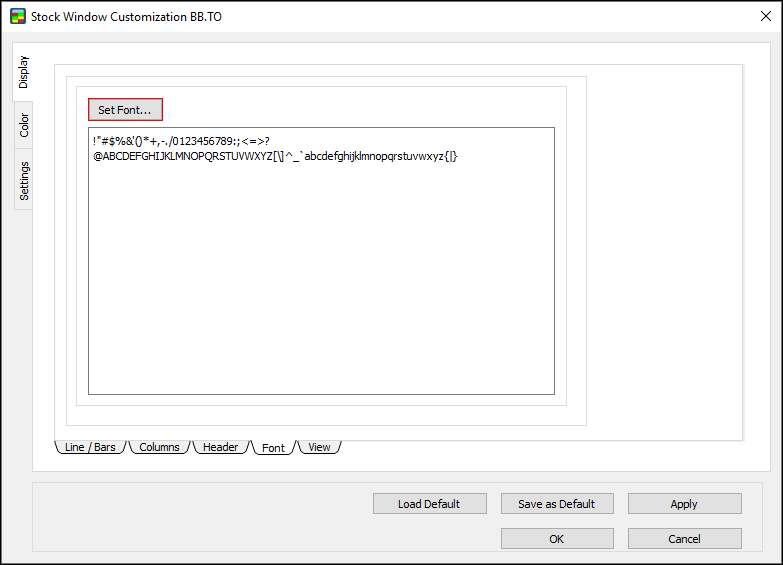
4. The Select Font window appears.
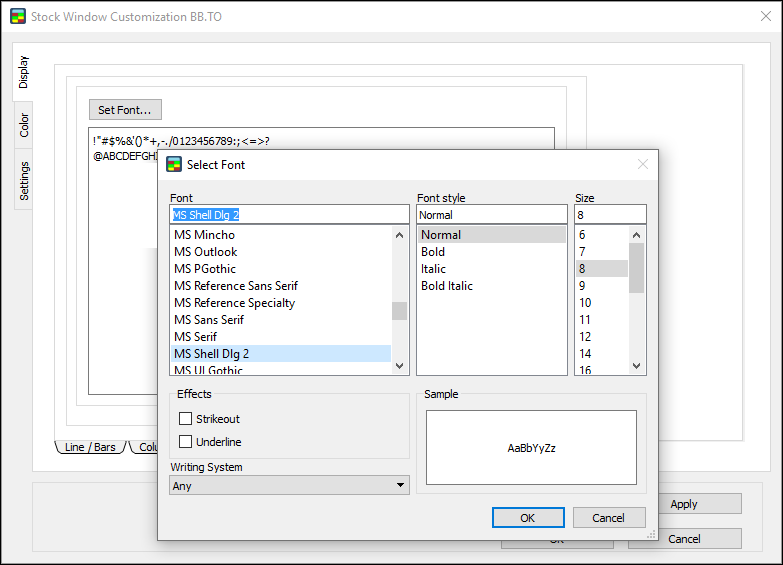
5. Click the font, font style, size, effects, and writing system you want to set.

6. Click OK.

7. Click OK.
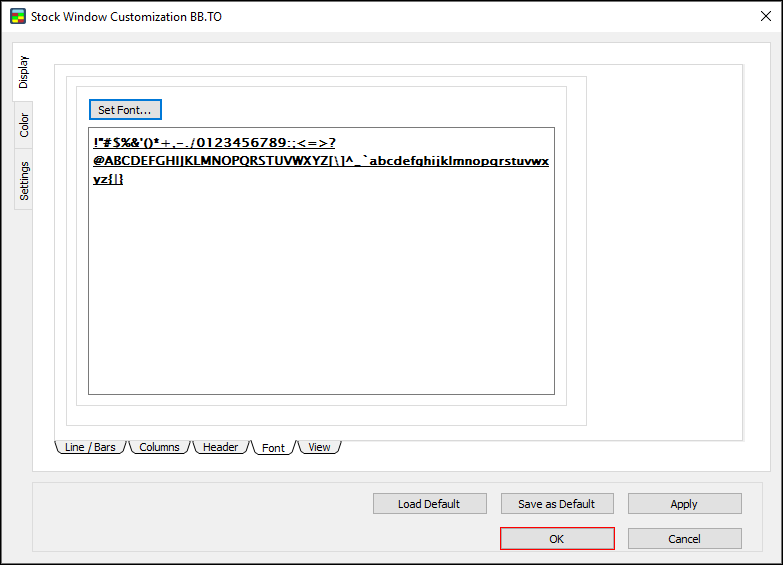
8. The new font appears in the Stock Window.
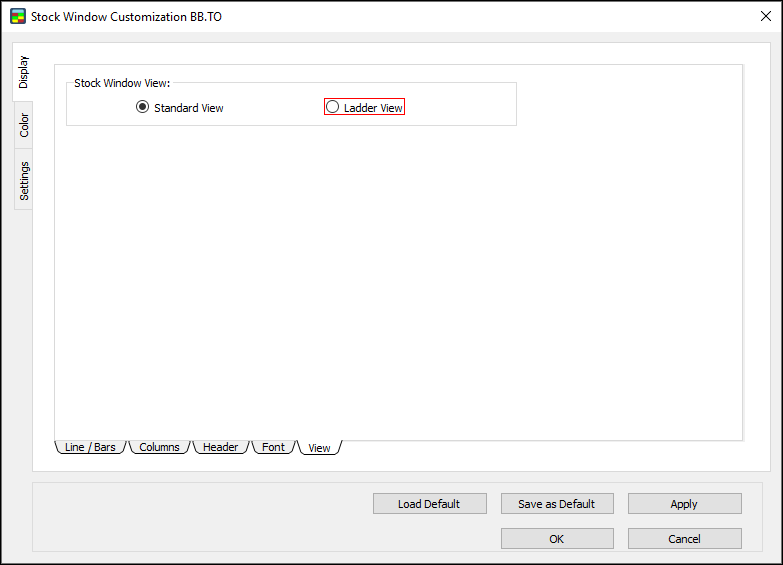
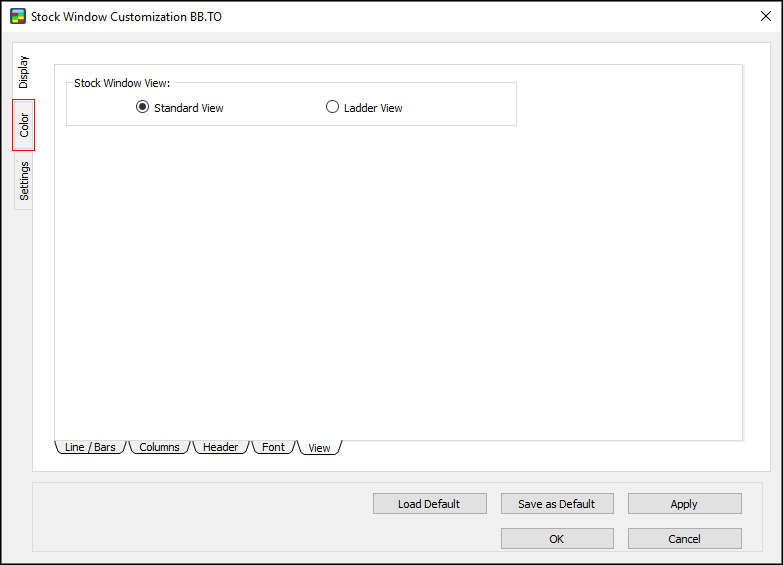
View
Use the View window to set the view type for the Stock Window.
Set a view for the Stock Window
1. In the Display window, click the View sub-tab.

2. The View window appears.
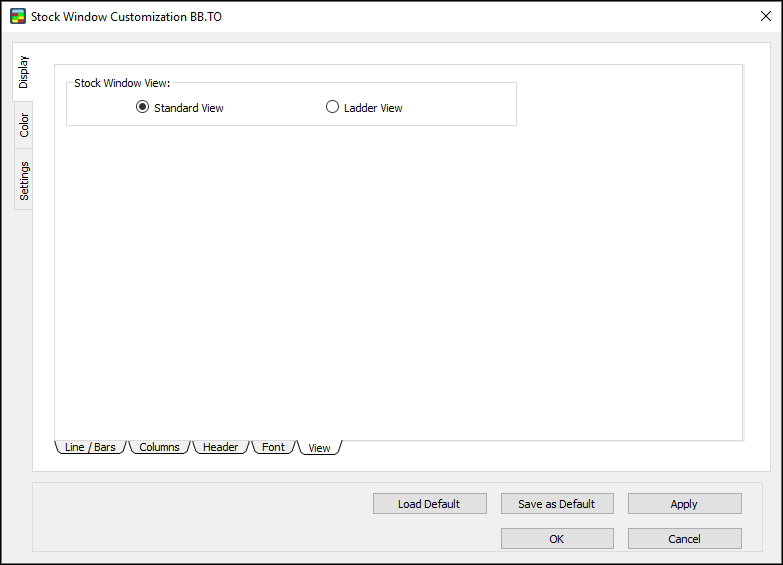
3. Click Ladder View to set the ladder view for the Stock Window.
4. Click OK.
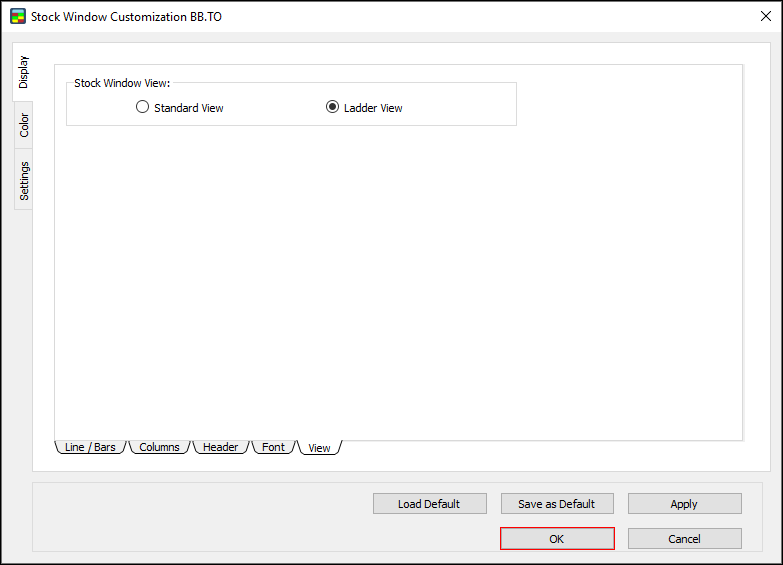
5. The Stock Window appears in ladder view.

6. Return to the View window and click Standard View to set the standard view for the Stock Window.
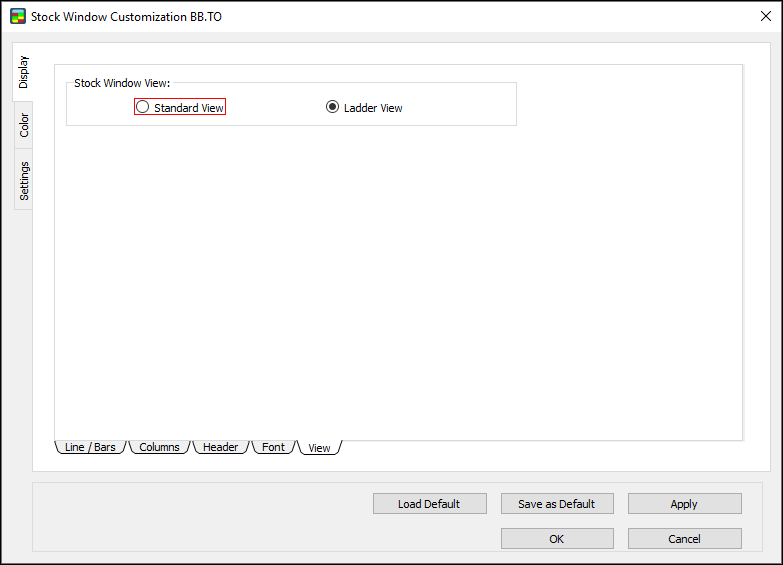
7. Click OK.
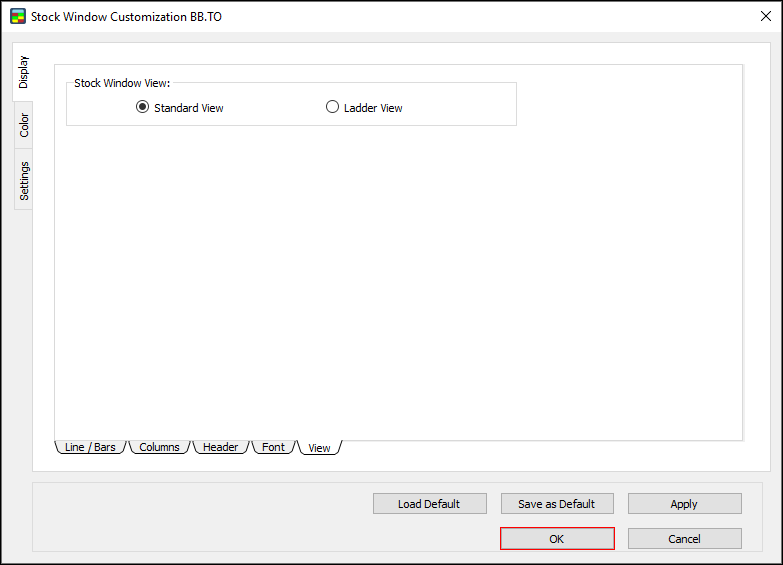
8. The Stock Window appears in standard view.

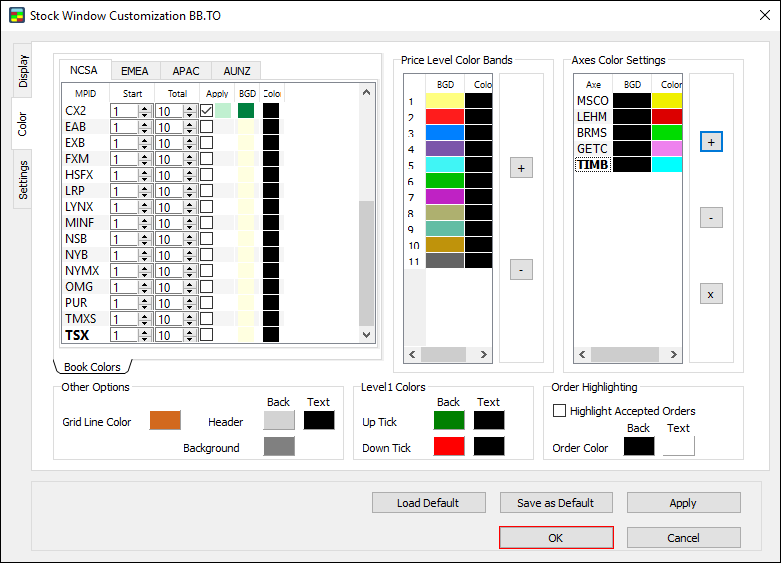
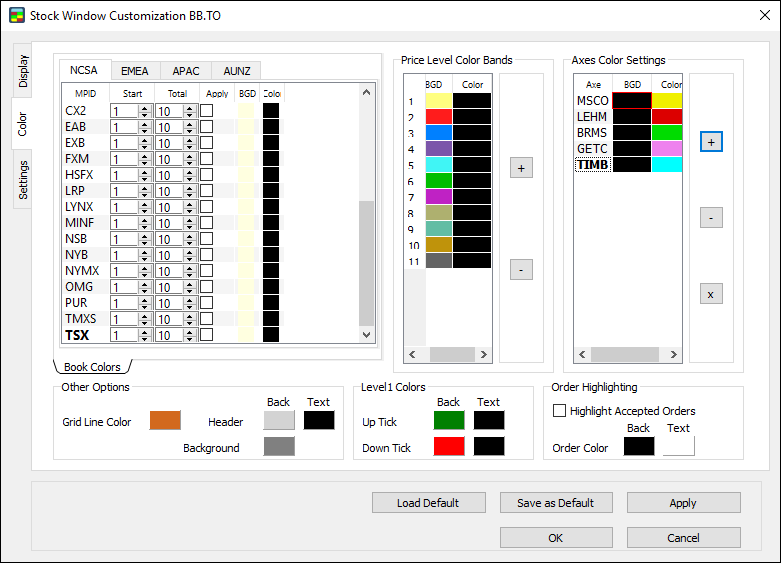
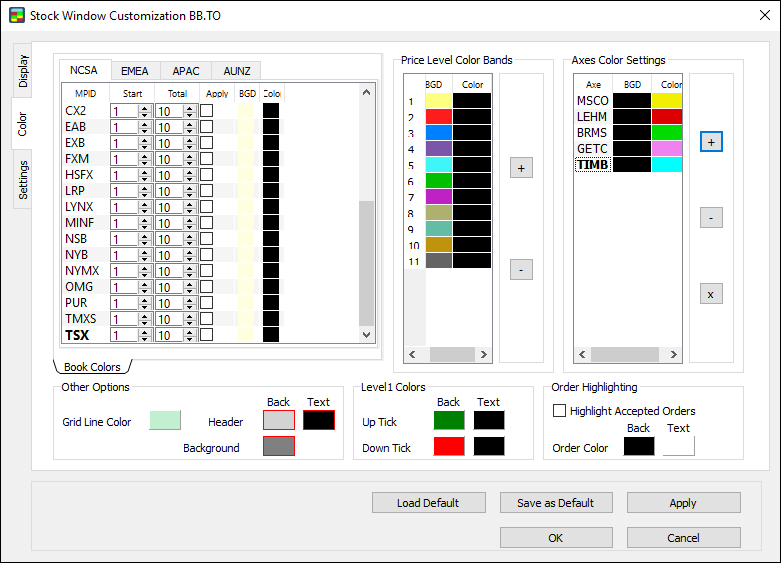
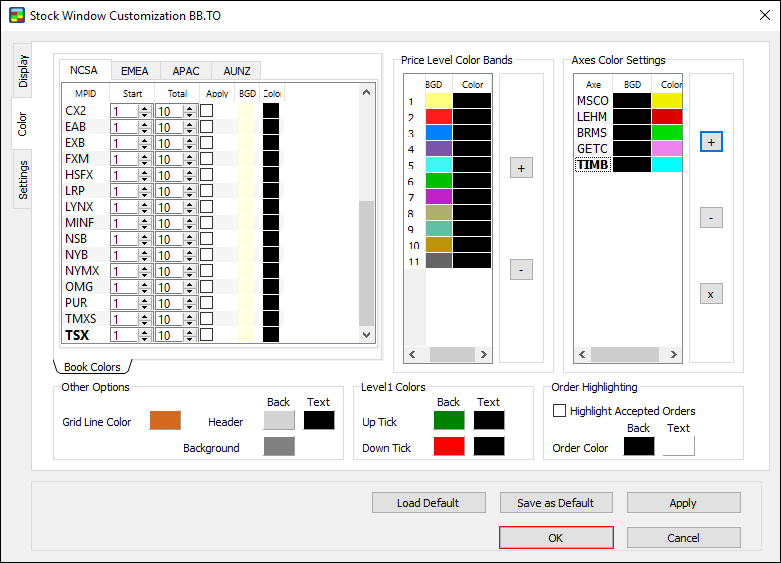
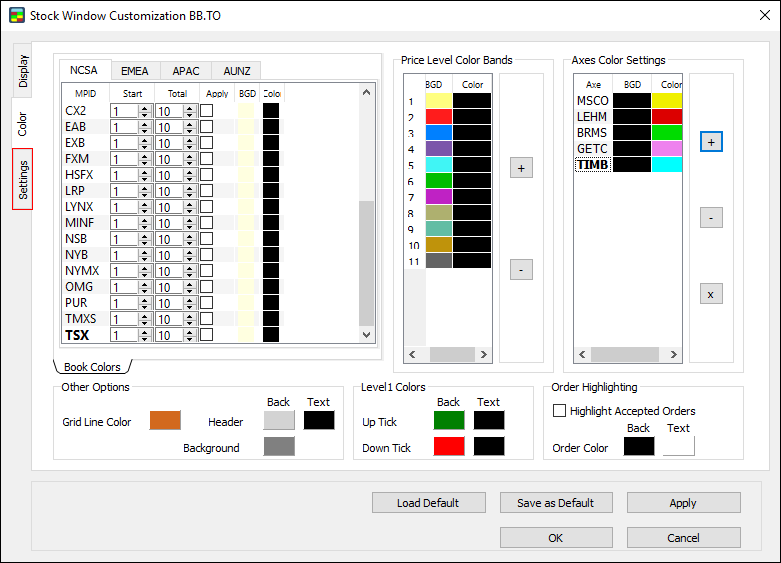
Color
Use the Color window to set the colors, which books to show, and how many levels to show in the Stock Window.
1. Click the Color tab.
2. The Color window appears.
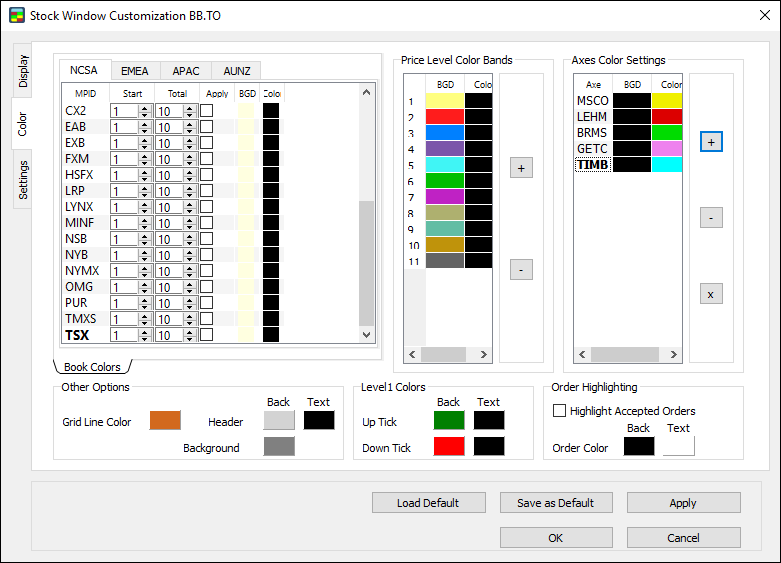
Set book color
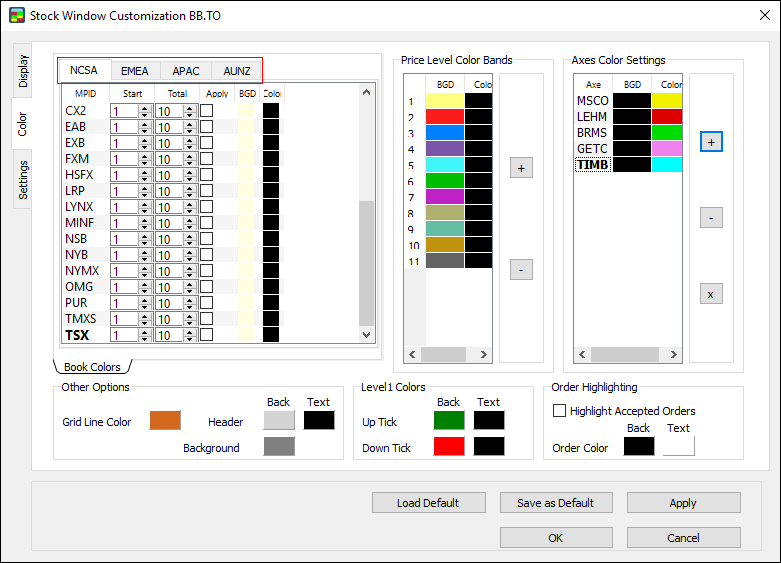
1. In the Color window, click the region tab for the region you want to set colors for (NCSA, EMEA, APAC, or AUNZ).
2. Select the check box under the Apply column heading for the book you would like to set a color for.

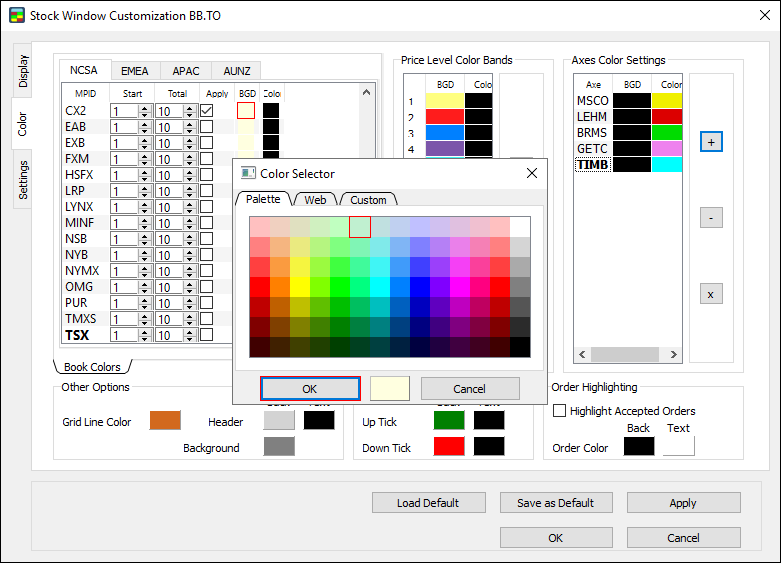
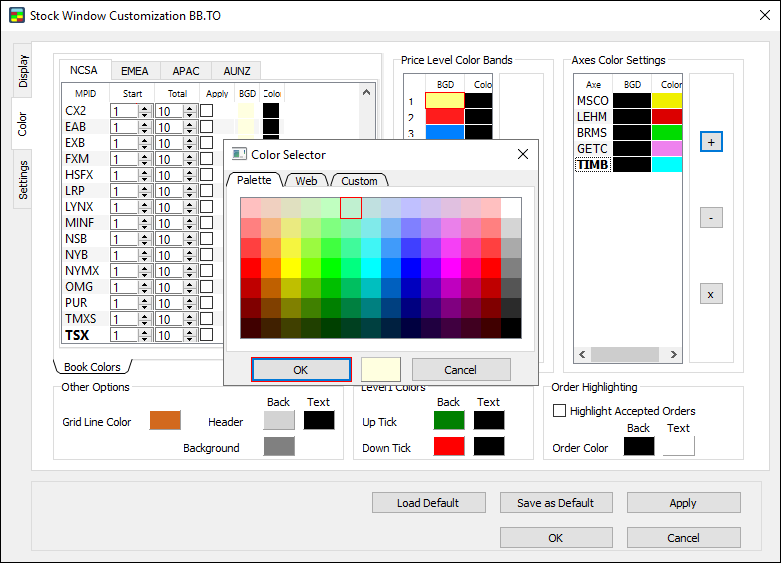
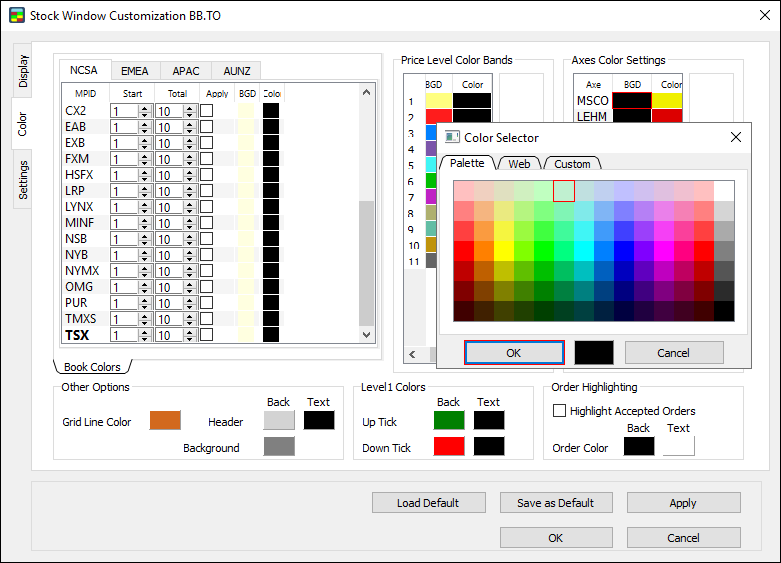
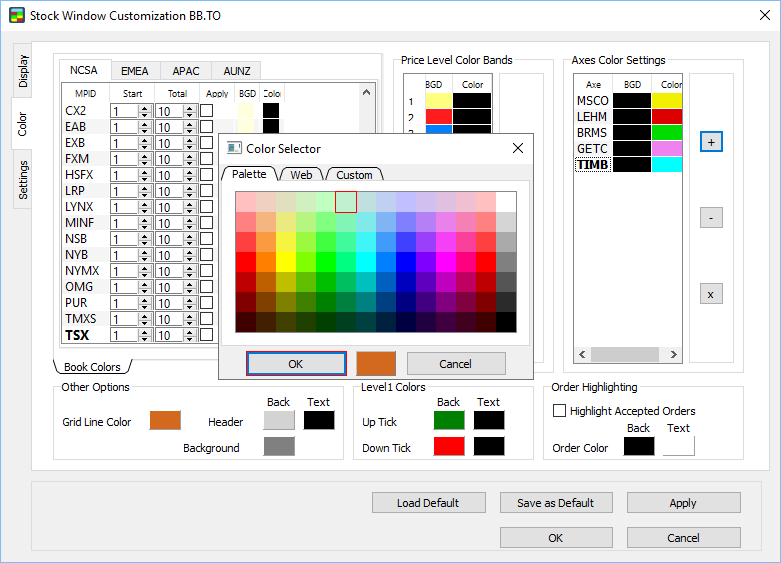
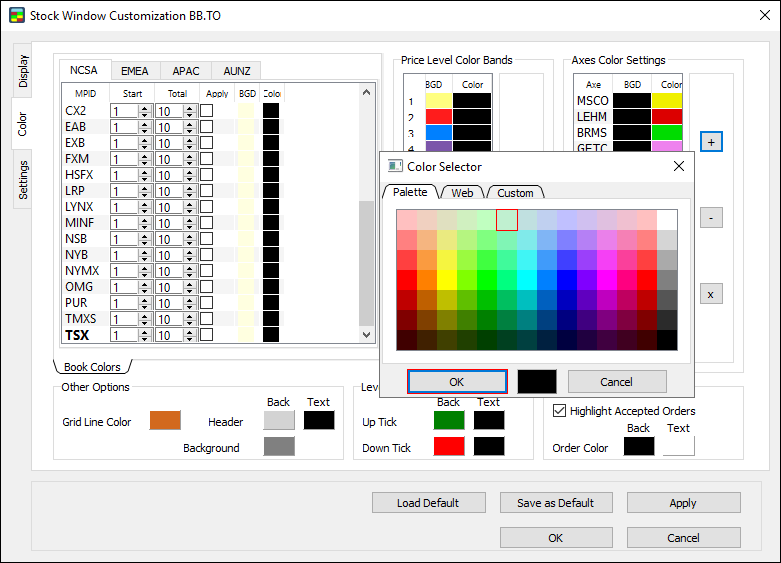
3. Double-click the color boxes under the BGD (for background) and Color (for foreground) column headings.

4. The Color Selector window appears. Click a color, and then click OK.
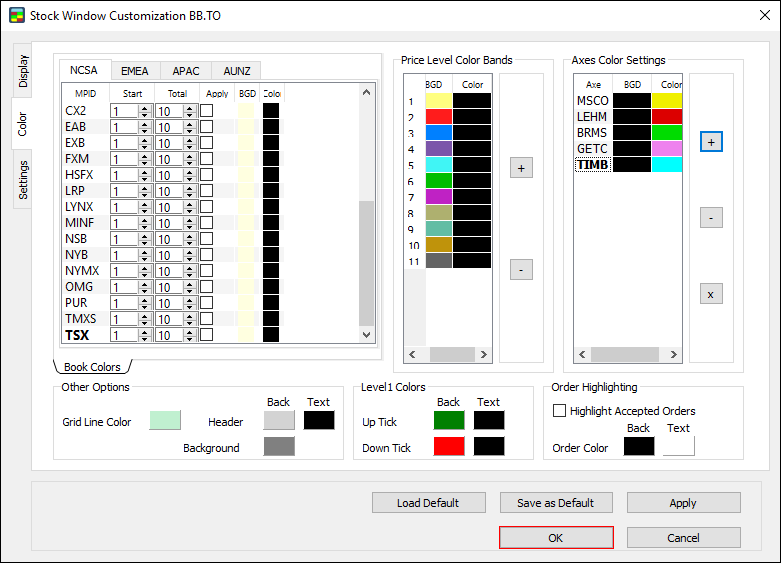
5. In the Color window, click OK.
6. The book color is set.
Set number of price levels
—
1. In the Color window, click the arrows under the Start and the Total columns to set the number of price levels to be consolidated (+++) for each book. Setting Total to 0 hides the book.
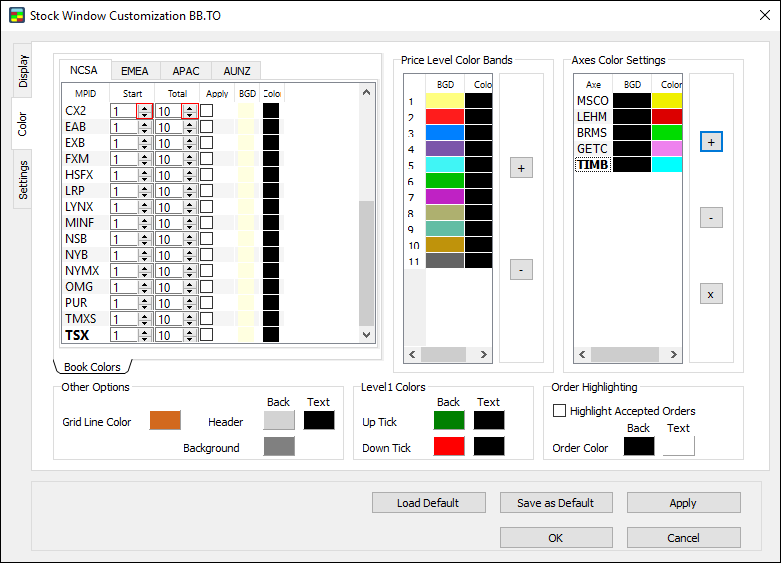
2. Click OK.
3. The adjusted levels appear in the Stock Window.
Set Price Level Color Bands
1. In the Color window, under Price Level Color Bands, double-click the color boxes under the BGD (for background) and Color (for foreground) column headings.
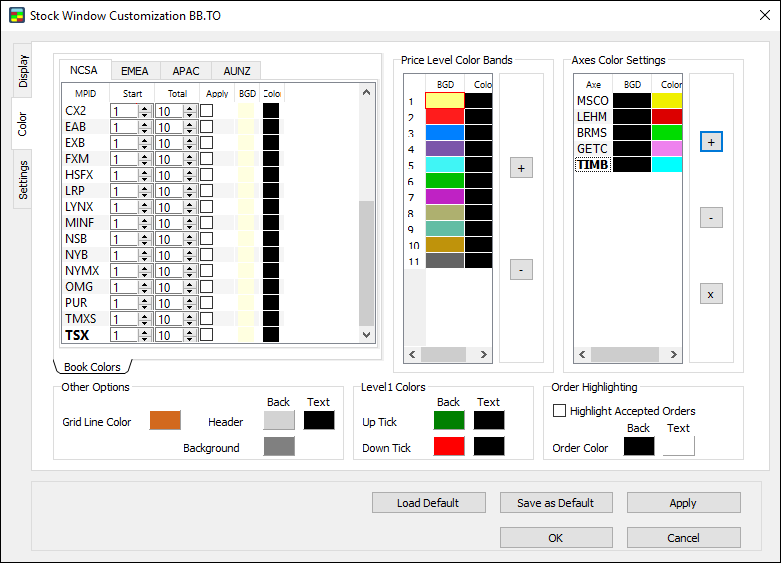
2. The Color Selector window appears. Click a color, and then click OK.
3. Click OK.

4. The colors are set for the price level band.
Adjust Axes Color Settings
1. In the Color window, under Axes Color Settings, double-click the color boxes under the BGD (for background) and Color (for foreground) column headings.
2. The Color Selector window appears. Click a color, and then click OK.
3. Click OK.
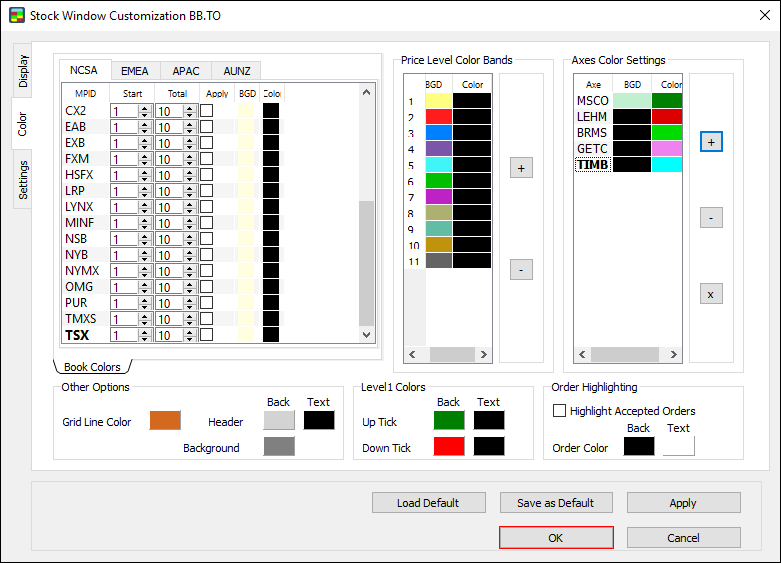
4. The colors are set for the axe.
Note: You can hide top-of-book quotes using the Axes Color Settings.
Set Other options
1. In the Color window, double-click the color box next to Grid Line Color.
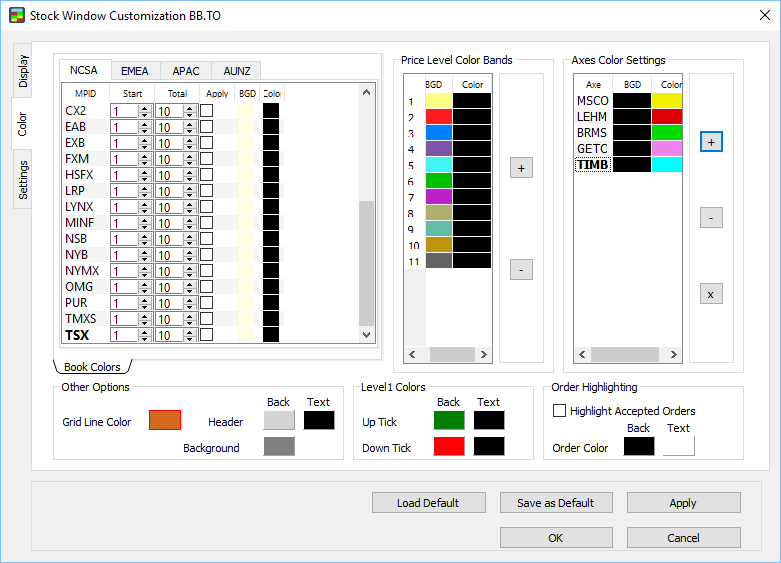
2. The color window appears. Click a color, and then click OK.
3. Similarly, click the colors for the Header and Background (Back and Text) color boxes, as needed.
4. Click OK.
5. The colors are set for the grid line and header.
Set Level1 Colors
1. In the Color window, under Level1 Colors, double-click the Back (for background) color box next to Up Tick or Down Tick.

2. The Color Selector window appears. Click a color, and then click OK.
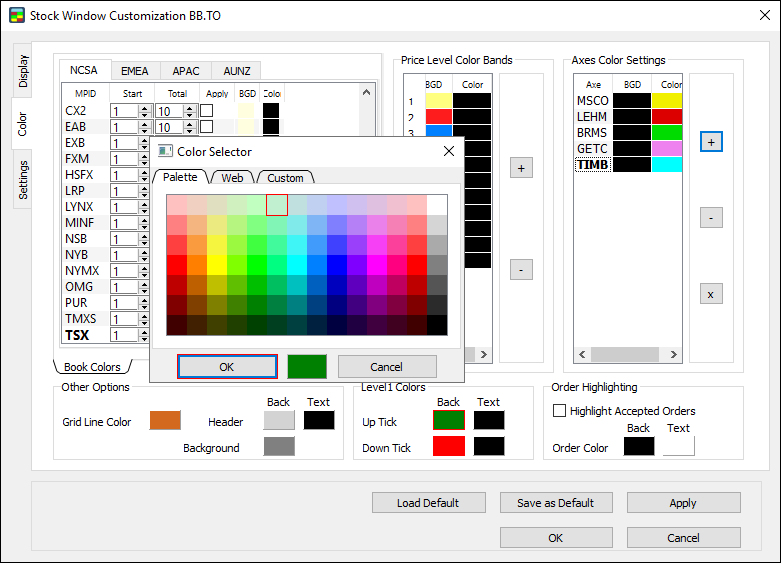
3. Similarly, click the color for the Text color boxes.

4. Click OK.
5. The colors are set for Level1 uptick and downtick.
Set Level1 Colors (Ask & Bid)
To apply Level 1 Uptick and Downtick colors to both ask and bid, please take the following additional steps:
1. In the Stock Window Customization Dialog, go to Level 1 Colors and select “Apply for Both Sides.”

2. Click “Apply” then “OK.”
Set Order Highlighting
1. In the Color window, under Order Highlighting, select the Highlight Accepted Orders check box.

2. Double-click the color boxes under the Back (for background) and Text (for text) column headings, as needed.
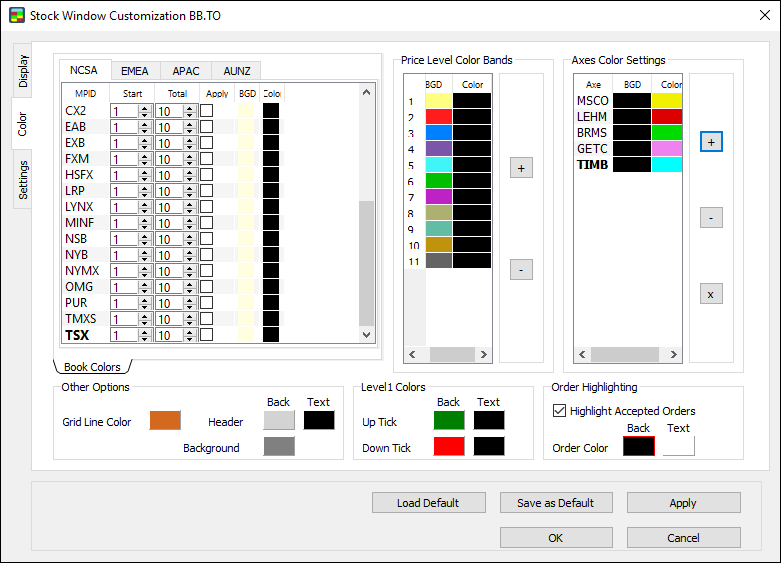
3. The Color Selector window appears. Click a color, and then click OK.
4. Click OK.
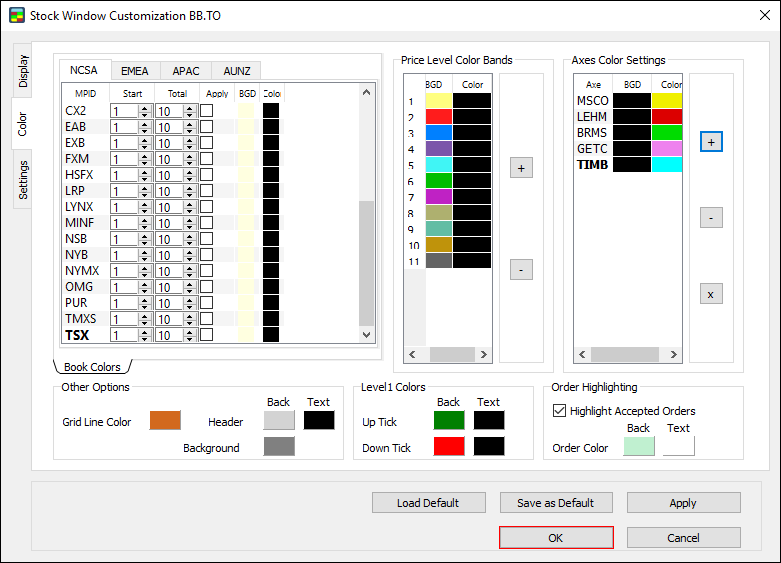
5. Order highlighting is set. You can now see at which price levels your orders are accepted.
Note: Order highlighting only works if the consolidated (+++) book is visible in the Stock Window.
Note: make sure to set Order highlighting before starting your trading activity. The Stock Window won’t highlight orders made prior to setting Order highlighting.
Settings
Use the Settings window to set window options, global options, and size for the Stock Window.
- Click the Settings tab to open the Settings window.
The Settings window contains three sub-tabs: Window Options, Global Options, and Size.
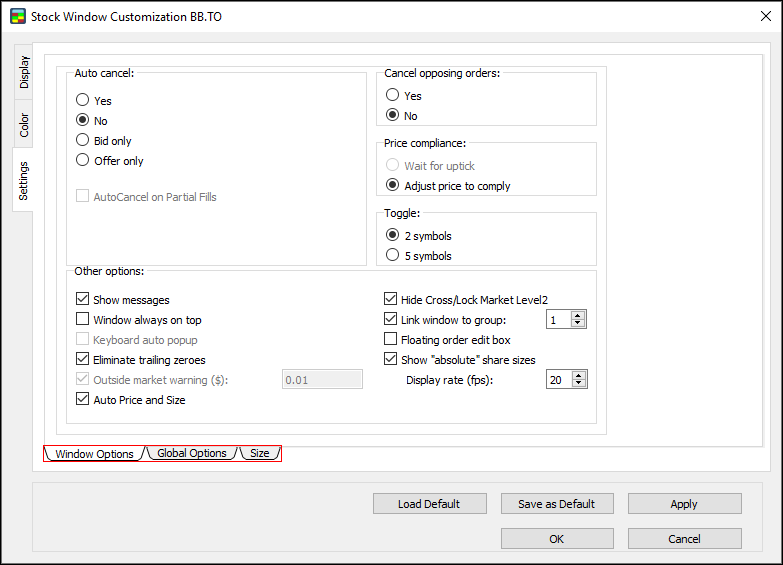
Window Options
Use the Window Options window to set the rest of the available customization options.
- Click the Window Options sub-tab to open the Window Options window.
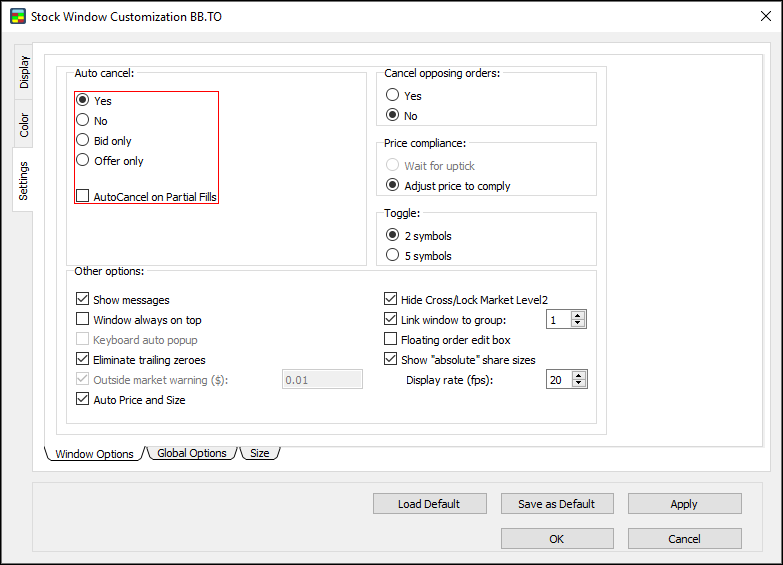
Set Auto Cancel
- In the Window Options window, under Auto cancel, click Yes, No, Bid only, or Offer only to set the auto cancel options:
- Yes: if this option is clicked, the auto cancel functionality turns on. When an order is filled, any existing parallel order must be cancelled.
- No: if this option is clicked, the auto cancel functionality turns off.
- Bid only: if this option is clicked, when a Buy order is filled, any Bid on the symbol must cancel.
- Offer only: if this option is clicked, when a Sell order is filled, any Offer on the symbol must cancel.
- AutoCancel on Partial Fills: this option becomes available for selection when the AutoCancel option turns on (that is, after clicking Yes, Bid only, or Offer only).
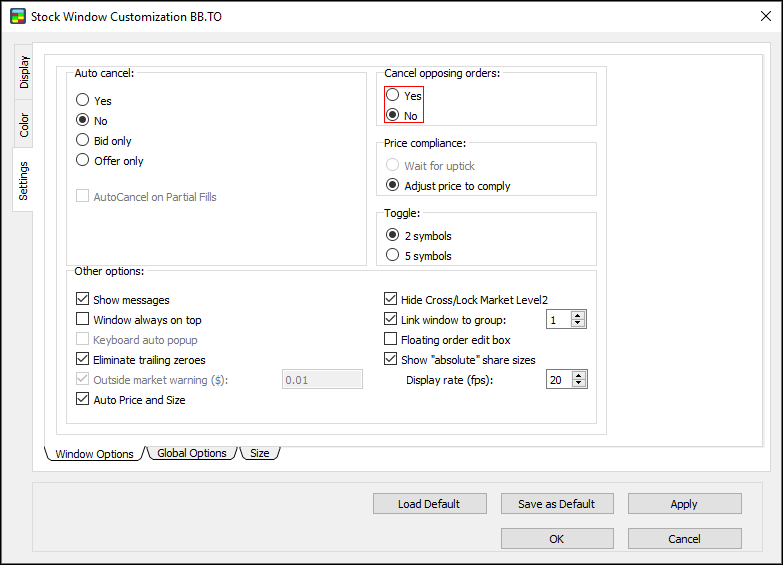
Cancel opposing orders
- If Yes is clicked, this option sends a cancel on all opposing orders at a locked or crossed price when a new order is placed.
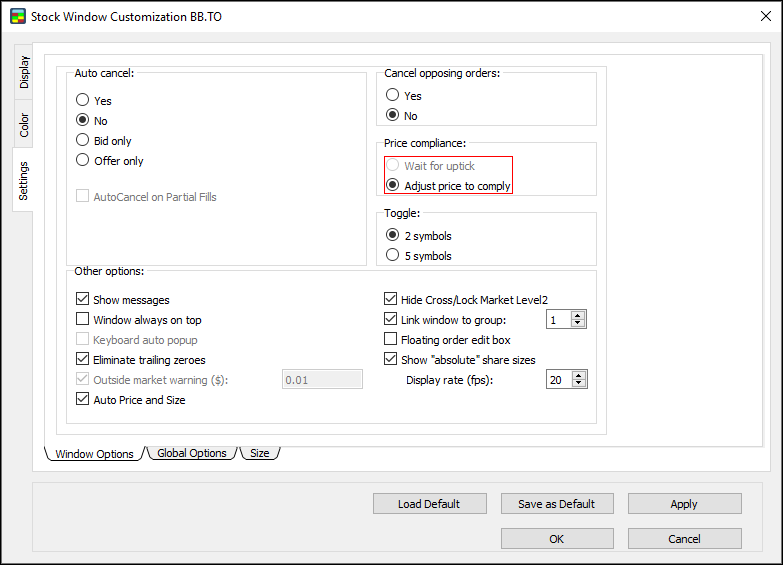
Set Price compliance
- Wait for uptick: this option is automatically set to unavailable.
- Adjust price to comply: this option is automatically set to round up to the appropriate tick size. For example, if a price can be typed as $10.125–$10.13, and you type $10.127, the number is automatically rounded to $10.13.
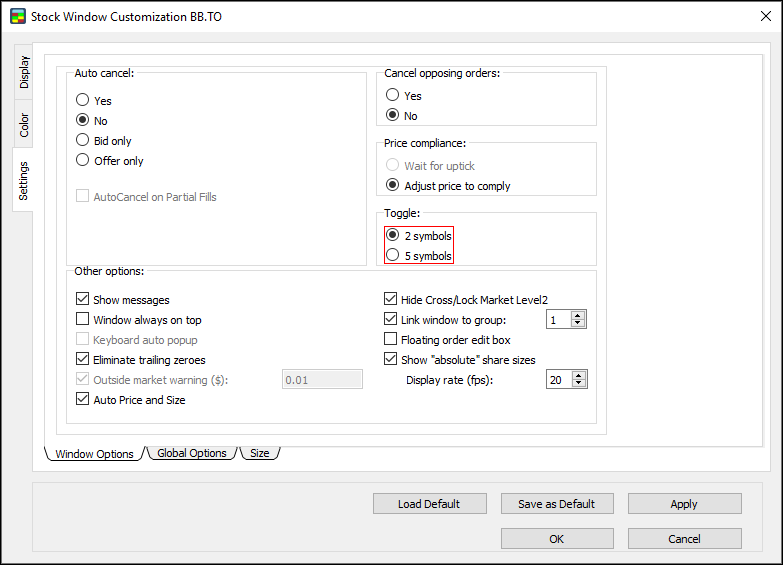
Set Toggle
- 2 symbols: if this option is clicked, the Stock Window retains two symbols for toggling when you press the Page Up or Page Down key.
- 5 symbols: if this option is clicked, the Stock Window retains five symbols for toggling when you press the Page Up or Page Down key.
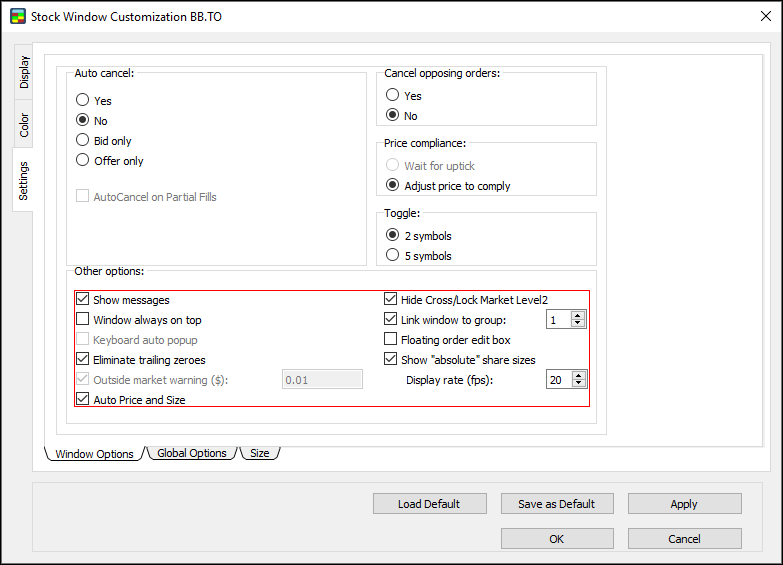
Set Other options
- In the Window Options window, under Other options, select the check boxes to set the following options:
- Show messages: if this option is selected, all order messages appear in the Messages box.
- Window always on top: if this option is selected, the Stock Window will be open on top of other windows at all times.
- Eliminate trailing zeroes: if this option is selected, any zeroes that trail the price on both Lv1 and Lv2 data are hidden. For example, “15.9700” appears as “15.97”.
- Auto Price and Size: if this option is selected, you can click a Lv2 Price, or Lv2 Total, and have the corresponding values applied to the Order Edit Box.
- Hide Cross/Lock Market Level2: if this option is selected, crossed/locked markets are hidden in Lv2.
- Link window to group: if this option is selected, the Stock Window is grouped with other tools, such as the Chart Window and the TOS Window. Other windows in the window group of the same number change their symbol to correspond to the symbol in the Stock Window.
- Floating Order Edit Box: if this option is selected, the Order Edit Box detaches from the Stock Window for positioning anywhere on the screen.
- Show “absolute” share sizes: if this option is selected, the true size of a book appears, showing odd lots when they are present. This does not apply to Lv1 size in the header.
- Display rate (fps): click or type a number to set the display rate in frames per second.
Note: selecting the Show absolute share sizes check box displays the actual share sizes on various ECNs, with zeroes. Clearing the Show absolute share sizes check box displays the sizes divided by 100. For example:
- 1100 shares on TSX are pending
- Clear the Show absolute share sizes check box: the number 11 (which is equal to 1100/100) appears
- Regardless of the check box, Volume (V) and Size (Sz) values always use the absolute share sizes
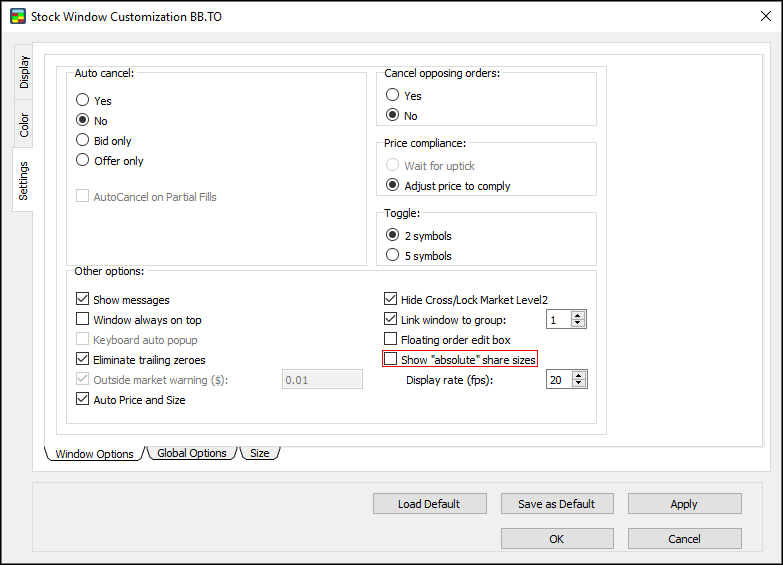
Note: The Show absolute share sizes option is not compatible with futures. Also, Lv2 uses multipliers, namely: thousands (K) and millions (M).
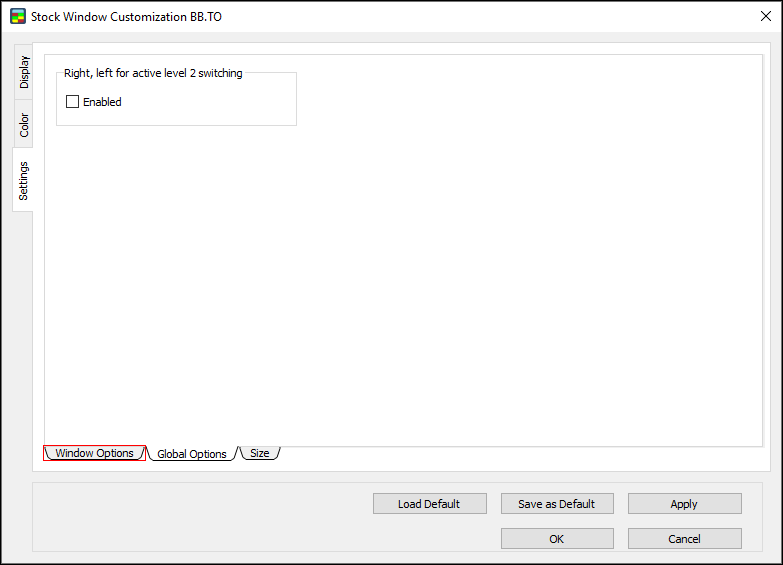
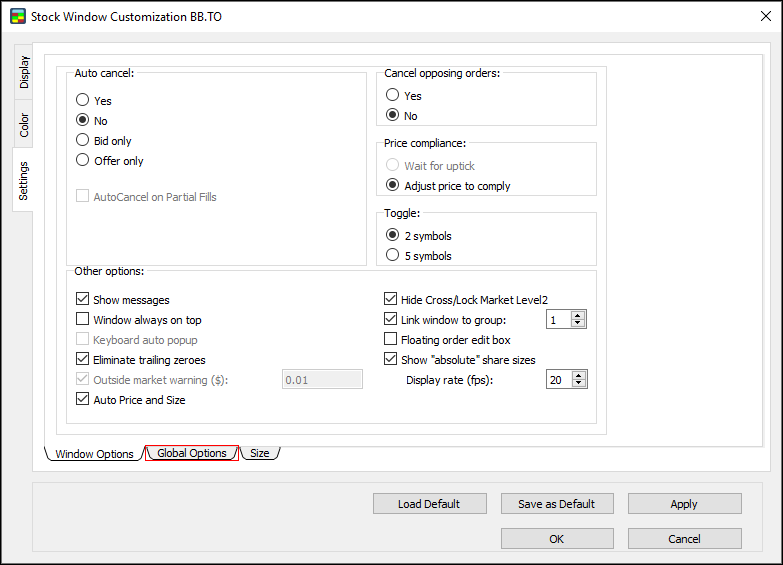
Global Options
Use the Global Options window to set the Lv2 switching option.
- Click the Global Options sub-tab to open the Global Options window.
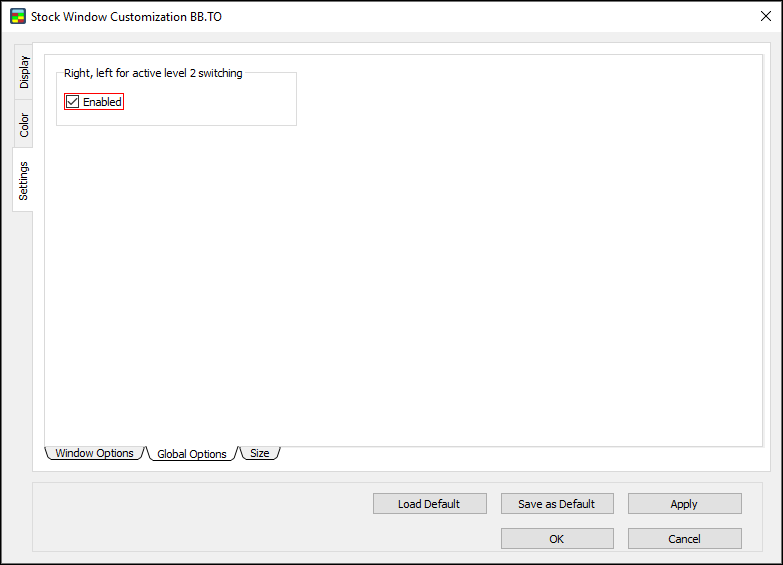
Set switching for level 2
- Right, left for active level 2 switching: if this option is Enabled, clicking the Right and Left Arrow keys moves between multiple Stock Windows.
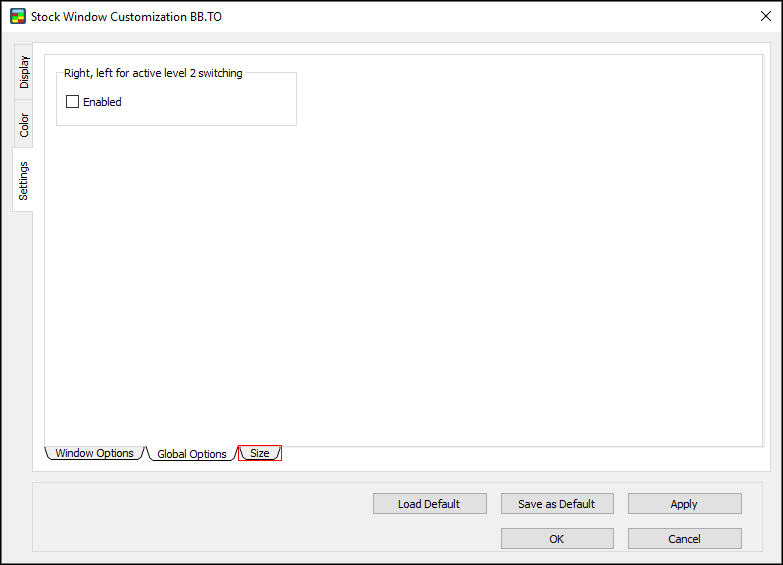
Size
Use the Size window to apply size defaults.
- Click the Size sub-tab to open the Size window.
Apply size defaults
- Click the Apply size defaults menu to apply defaults by:
- Symbol: if this option is clicked, the default order size applies to all orders on a certain symbol.
- Window: if this option is clicked, the default order size links to a certain window, but symbols open in other windows are not affected.
- Click a column heading to sort alphabetically or by size.
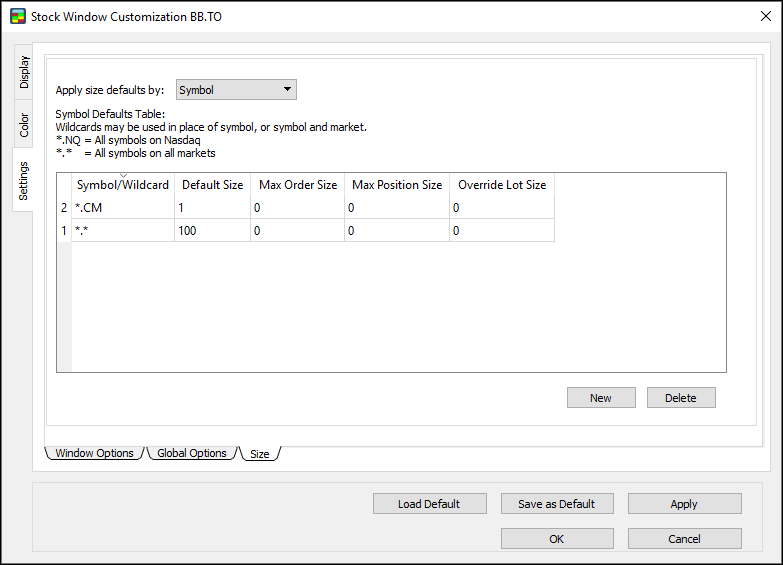
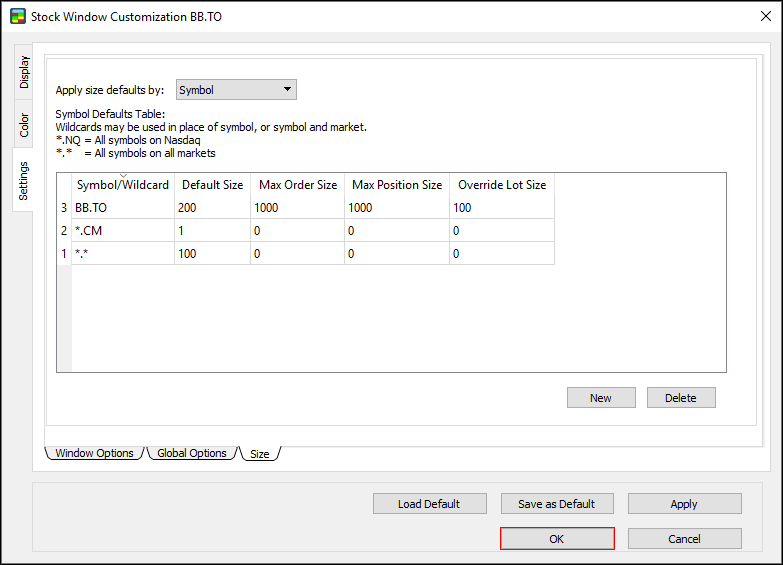
Set symbol defaults
Use the symbol defaults table to set the default order size, maximum order size, and maximum position size for a certain symbol or wildcard.
New: the symbol defaults table now syncs across all open instances of the Stock Window. Simply press a hotkey for an order, and then press Ctrl + NumPad to set the share size. The next time you open Customization for an open instance, the table will be populated with a new row for each symbol.
Add or delete new size defaults by symbol
1. Click Symbol, and then click New.
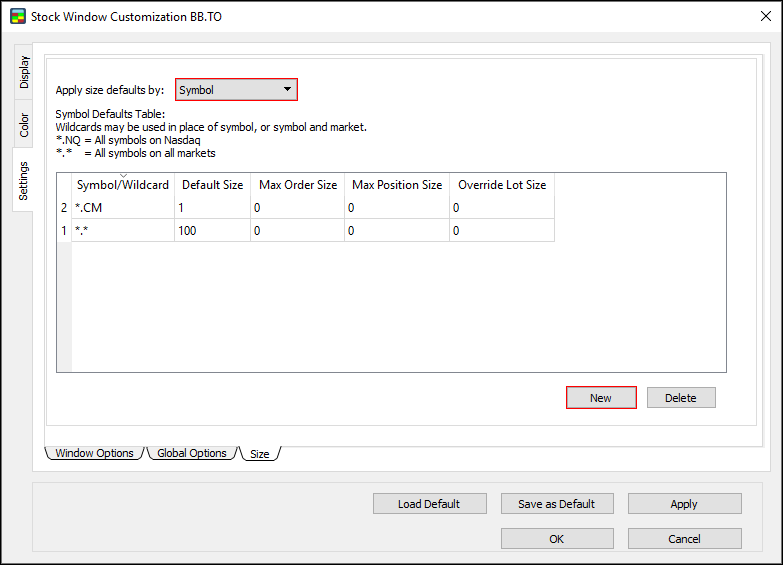
2. The Add new size defaults by symbol window appears.
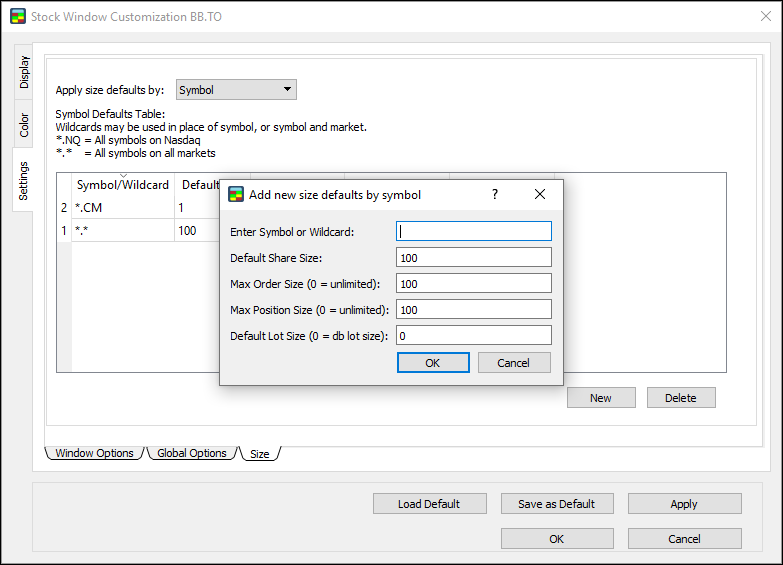
3. Type values into the following fields: Enter Symbol or Wildcard, Default Share Size, Max Order Size, Max Position Size, and Default Lot Size.
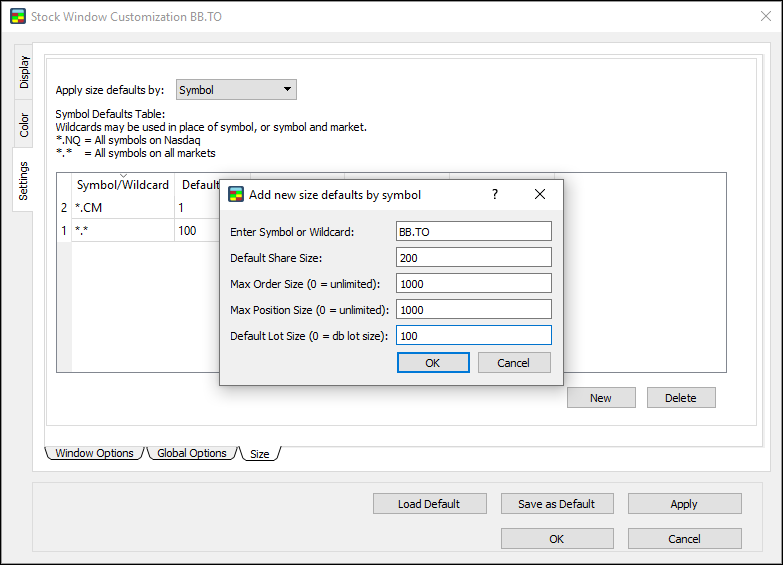
4. Click OK.
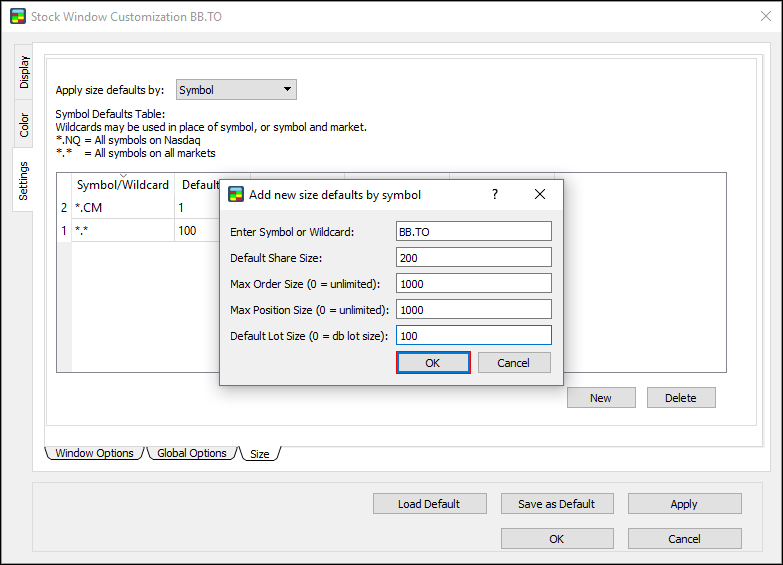
5. In the Size window, click OK.
6. The size defaults are set for the symbol.
Set size defaults by window
1. Click Window.

2. Select or clear the check boxes for Default shares, Maximum order size, Maximum position size, and Override lot size.
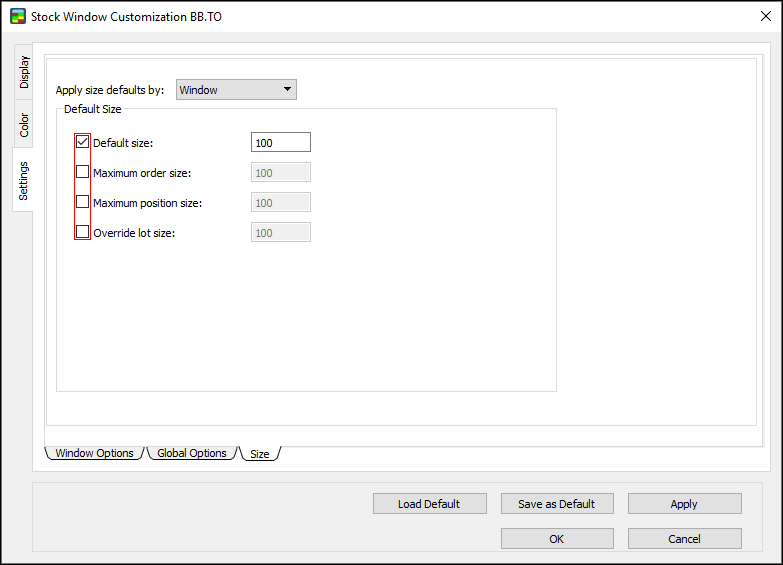
3. Type a numerical value for each selected option.
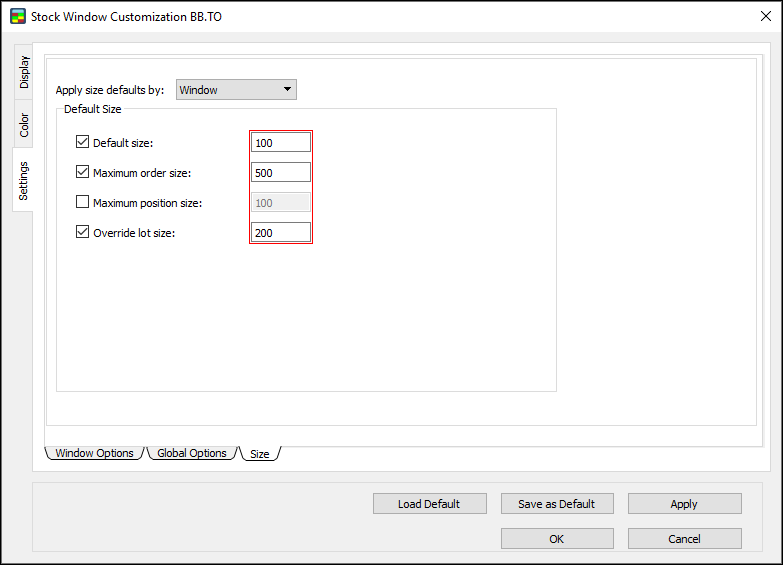
4. Click OK.

5. The size defaults are set for the window.
Set an override lot size
Use the override lot size feature to set the override lot size for a certain symbol or wildcard.
1. In the Size window, click the Override Lot Size cell for a symbol or wildcard.
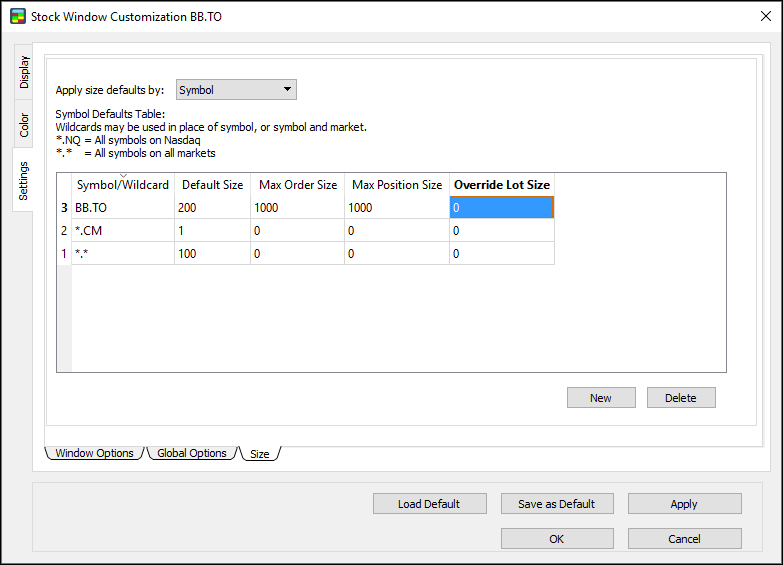
2. Type the override lot size you want to set for the symbol.

3. Press Enter, and then click OK.
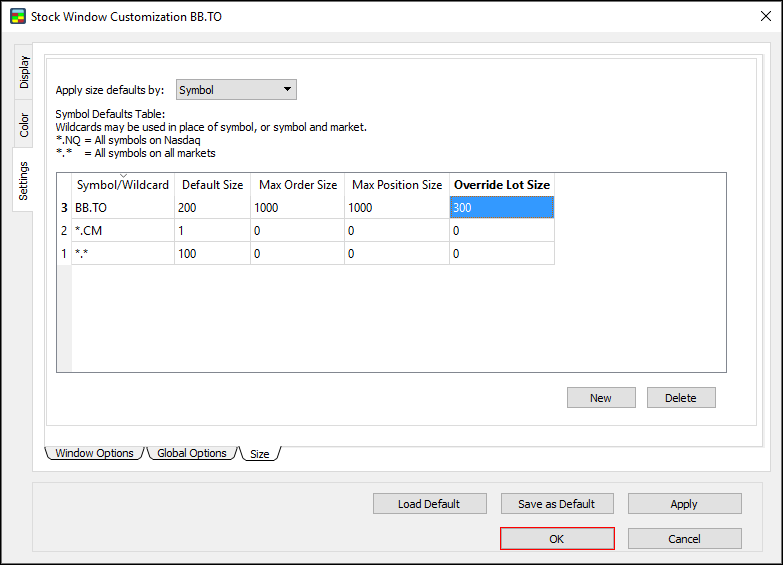
4. The override lot size is set.
Example: with an override lot size set to 300, press Ctrl + 1 in the Stock Window to override the lot size to 300, Ctrl + 2 to override to 600, Ctrl + 3 to override to 900, and so on.
Alignment Editor
Use the Alignment Editor to align columns to the left, center, or right in the Stock Window.
Align a column in the Stock Window
1. Right-click a column heading, such as MPID, Price, Size, Time, Depth, or Total, in the Stock Window.
2. The Alignment Editor appears.
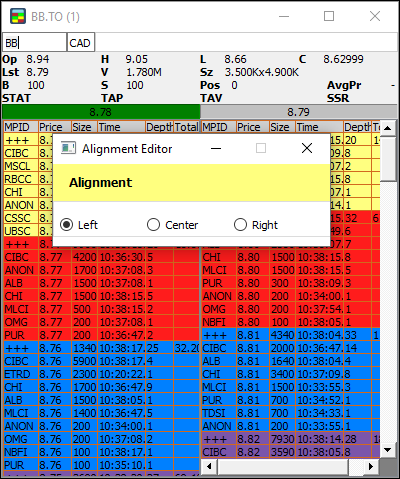
3. Click Left, Center, or Right to align the column left, center, or right.
4. The column is aligned.